

Having a collection of versatile right-hand (picking-hand) techniques is important for any well-rounded fingerstyle player. When it comes to the Travis-Picking style there are a great deal of patterns to study and get under your hands. Patterns are nice because they are ordinarily short passages that, with enough repetition and practice, are easy to memorize. Each pattern has a different rhythm, harmonic personality, feel and character. The skills used to play these patterns often show up when playing a fingerstyle song or arrangement and can also be valuable for accompaniment or warming up. Picking patterns are great for improving your technique, motor skills, dexterity, gaining thumb independence, finger independence, developing good tone, volume control and dynamics.
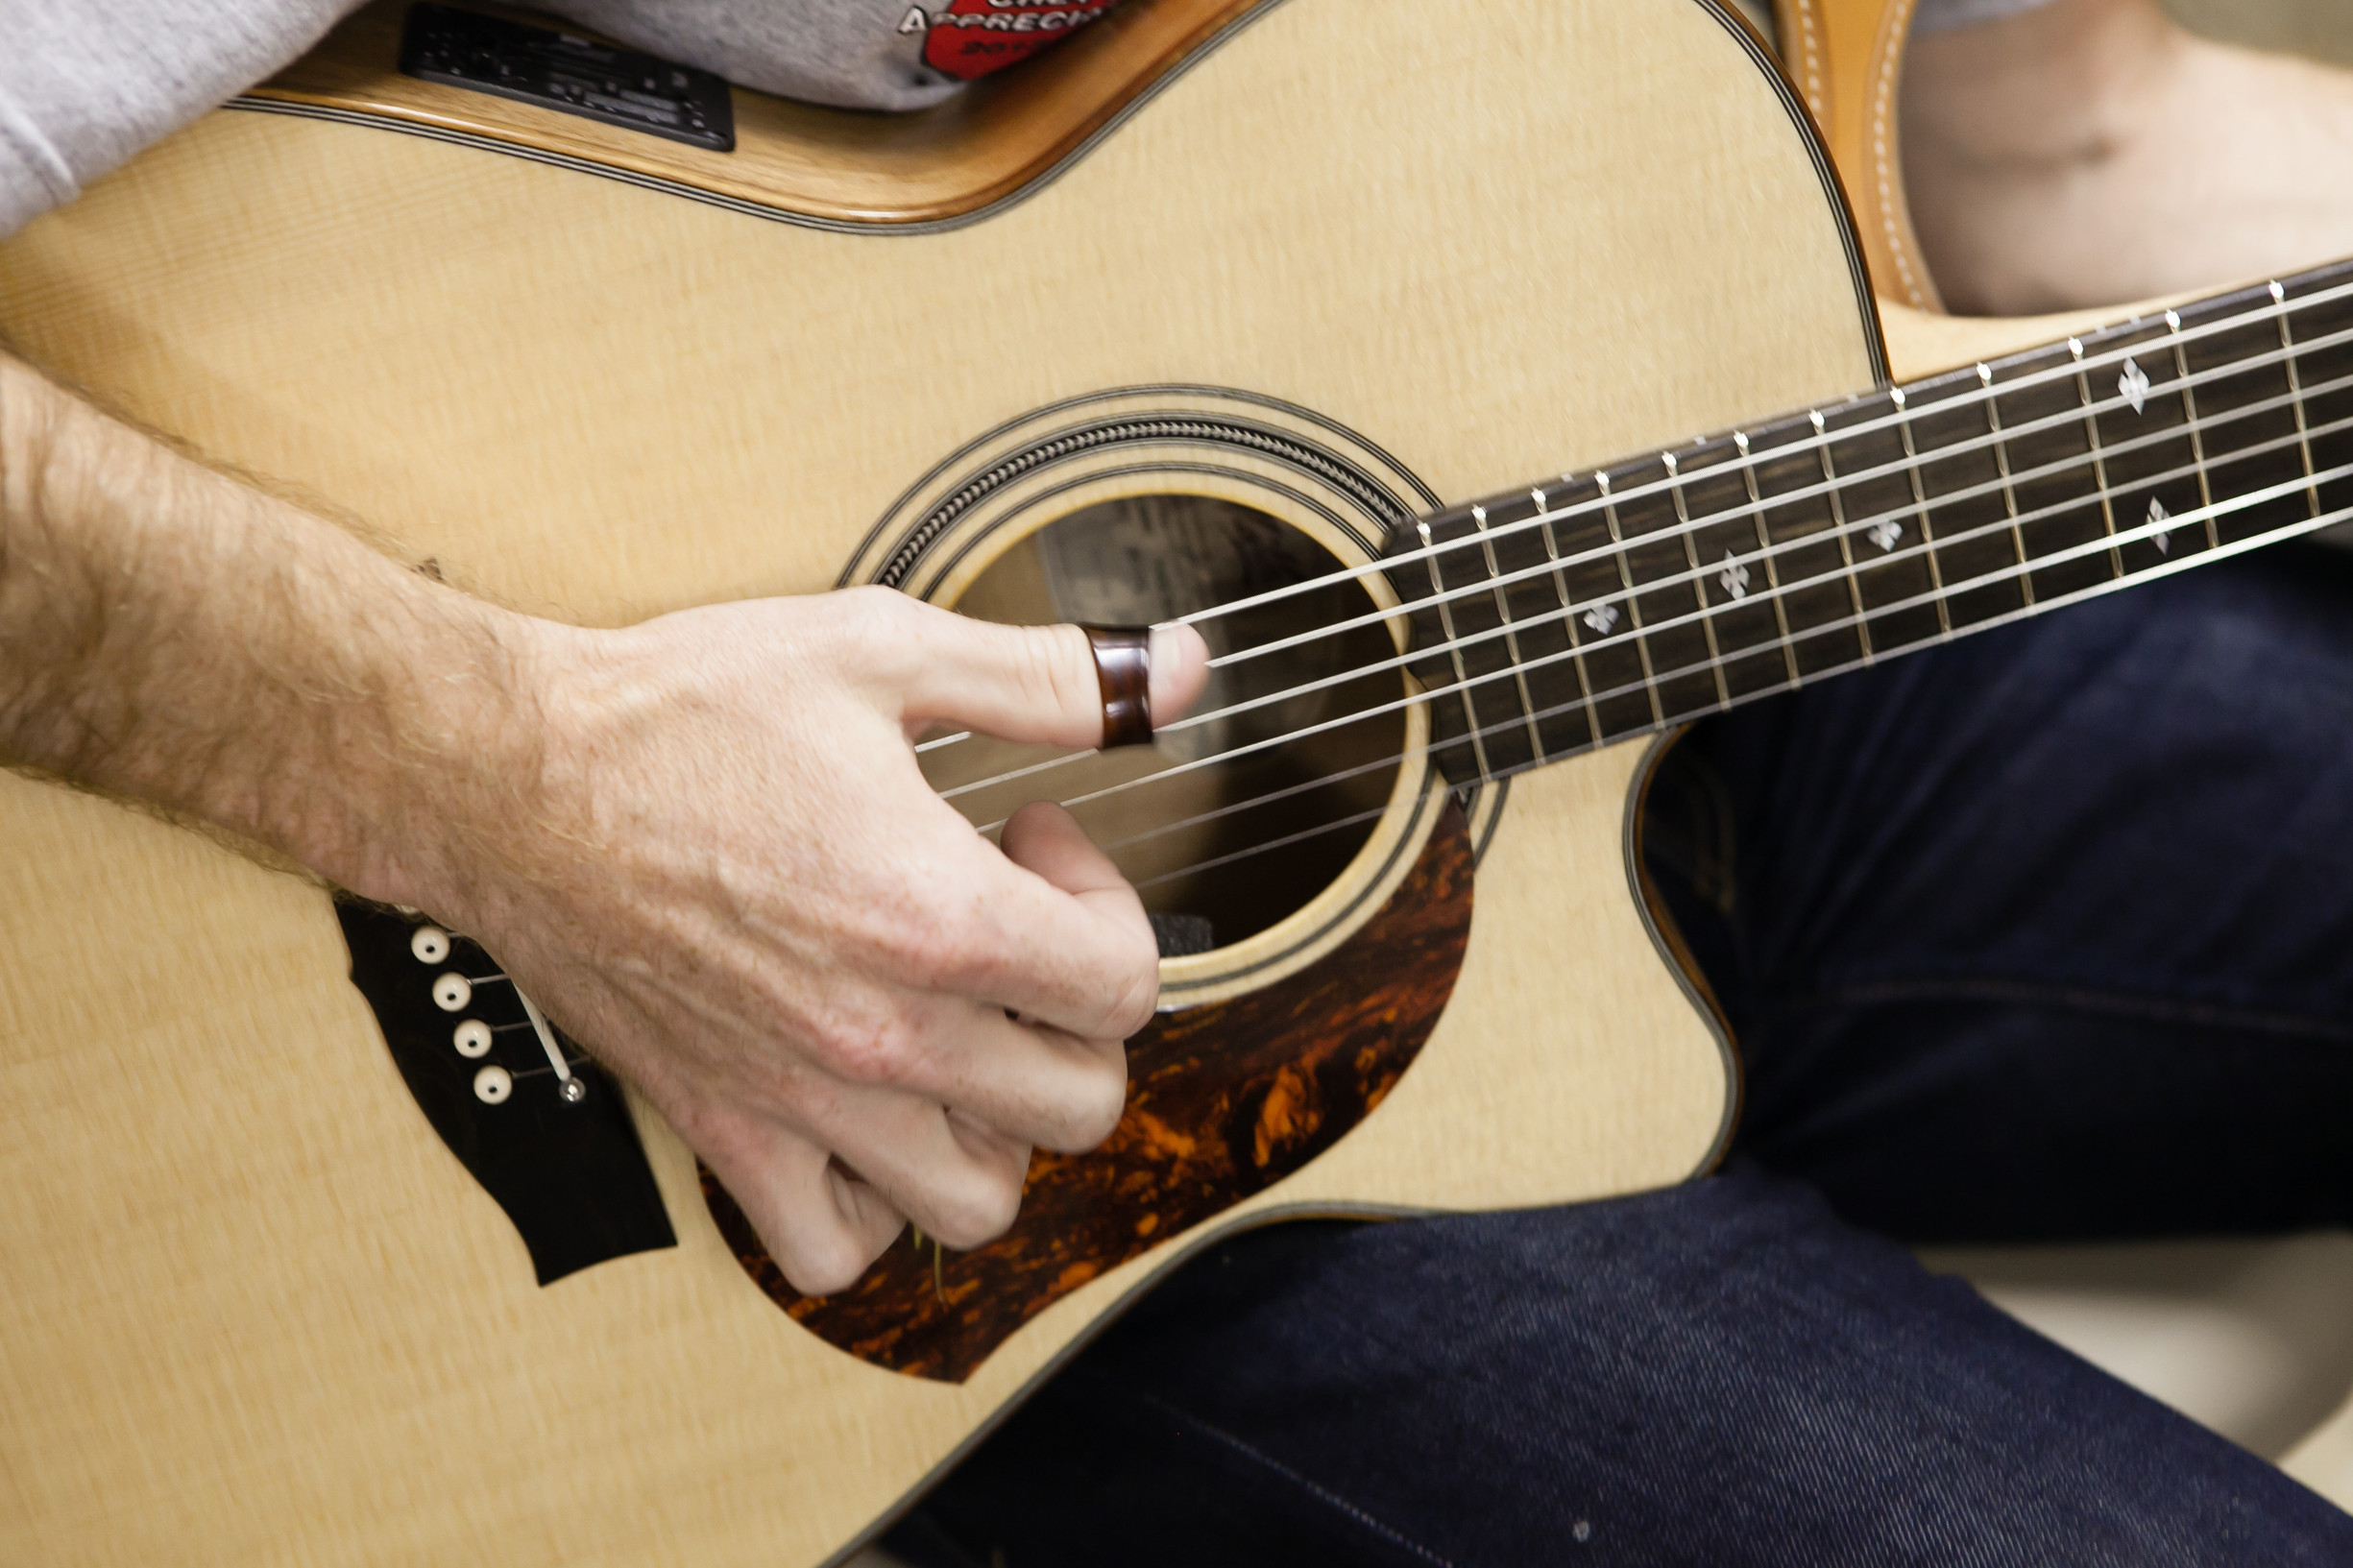
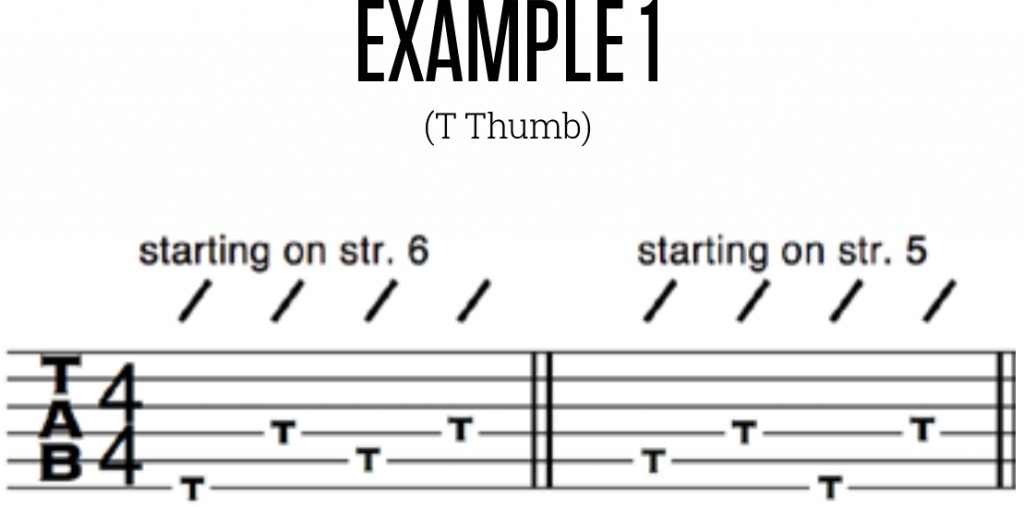
When it comes to learning these picking patterns, the concept that is the most integral (to be learned first) is thumb independence (a.k.a. alternating bass), followed by gaining comfort and control using your fingers. Below is an example of what the alternating thumb pattern looks like when the fretting hand is playing a chord with the root located on either the 6th string or root on the 5th string. This alternating thumb concept is the basis for all Travis Picking. The thumb will be playing on every beat of the measure, alternating strings (never consecutively picking the same string) and always starting by striking the string in which the root of the chord is located, on beat one.
There are some fantastic techniques you can start progressing into once you have a grasp on thumb independence. (Disclaimer; if you have never used your fingers in combination with the thumb playing at the same time this will likely take much repetition and practice to become fluent with, be patient and work slowly).
One of my favorite techniques is syncopated picking patterns with double stops. These types of patterns utilize the pairing of the middle and ring finger, playing in unison and the index finger playing independently. If you listen to Jerry Reed play tunes with a funky, syncopated groove like “The Claw”, “Guitar Man”, “Wabash Cannonball” or Buster B. Jones play “Misdirected Energy”, “Jus D’ Orange”, “Live @ Five”, “Funky Fingers” you’ll hear numerous patterns that employ the double-stop technique.
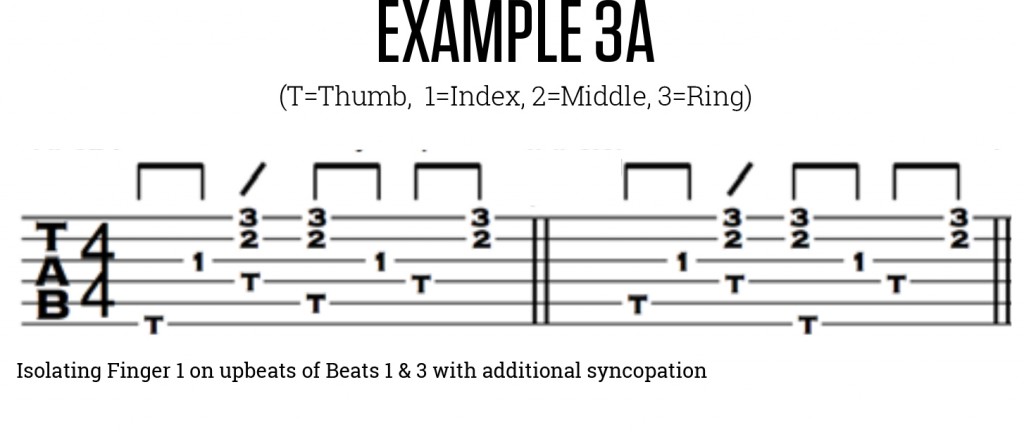
The patterns become more complex as you incorporate the index, middle and ring fingers, which will be placed on the 3rd (G) string, 2nd (B) string and 1st (E) string respectively. The fingers will play both on the beat and in between the beat (on the up beat). What’s unique about these types of patterns is not only having all the fingers and thumb playing simultaneously, but also having the fingers play independent of the thumb creating syncopation.
The below pattern is essentially built upon the alternating thumb pattern from above (ex. 1). Notes to pay some extra attention to and make sure you’re accurately implementing are the thumb, index, middle and ring fingers playing simultaneously on beat two, followed by the index finger playing independently on the upbeat of beat three and the middle and ring finger being paired together, playing in unison on the upbeat of beat four. It is often helpful to count the pattern out loud to yourself, one, two, three and four and…etc.

Here is another example with more syncopation with the index finger between beats one and two.
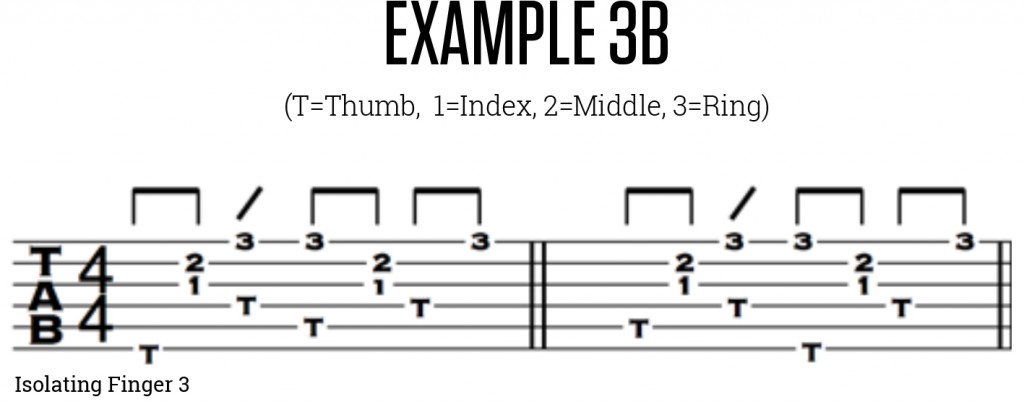
Another variation that can be used with these type of patterns is pairing the index and middle fingers to play in unison and having the ring finger play independently. If you have trouble pairing any two particular fingers to play in unison you can try using a piece of tape or a rubber band to gently keep your fingers braced together. Remember repetition will help internalize this technique. Here is a slight variation of “Example 3a”, this time with the index and middle finger paired together and the ring finger playing independently.
As you begin to grasp these new patterns take a step back and consider these tips. First strive for accuracy then speed. Experiment by applying the patterns to a variety of different progressions and chord qualities. As you gain comfort compare and observe the difference in sound and feel from playing a particular pattern at 60 BPM vs.100 BPM. Initially strive to play the patterns very rigid with every note exactly on the beat or off-beat. Once the patterns seem comfortable enough see if you can be more lenient and relaxed with your feel. Experiment with playing notes slightly ahead or behind the beat. For more in-depth instruction of these types of techniques and concepts you can find my “Ultimate Fingerstyle Toolbox” workshop and “Fingerstyle Survival Guide” course on TrueFire.com.