

Playing One Chord:
If you think about it, this skill is one of the most fundamental and basic of all we do on the guitar, and one of the most important to master. Too often, we learn our chords, start playing tunes, and go, without ever revisiting how they actually sound and if we’re nailing the changes. Too often we think, because we are holding the correct shape, we are playing the chord correctly. If we don’t master this basic skill, we will miss so much in our playing.
Try this exercise: Play your favorite chord. Listen to it. How does it sound? It’s useful for even the most advanced among us to check in on how clearly we are playing our chords. Strum the chord, then arpeggiate. Play each note one at a time. Can you hear all the notes in the chord? Are you playing all the notes that should be in the chord? Those little “X”s on the chord diagrams are really important because they show what notes should be muted. Is the chord in tune? Your guitar can be in tune, but too much pressure or not enough pressure can cause the chord to be out of tune. Strumming the chord with too much strength can cause the strings to ring sharp. If you’re a beginner, it won’t take long to realize changing chords is one of the great challenges we face as guitar players. Playing the chords correctly is only half the battle. Staying in time while moving to a new chord is a challenge too.

Playing a chord progression:
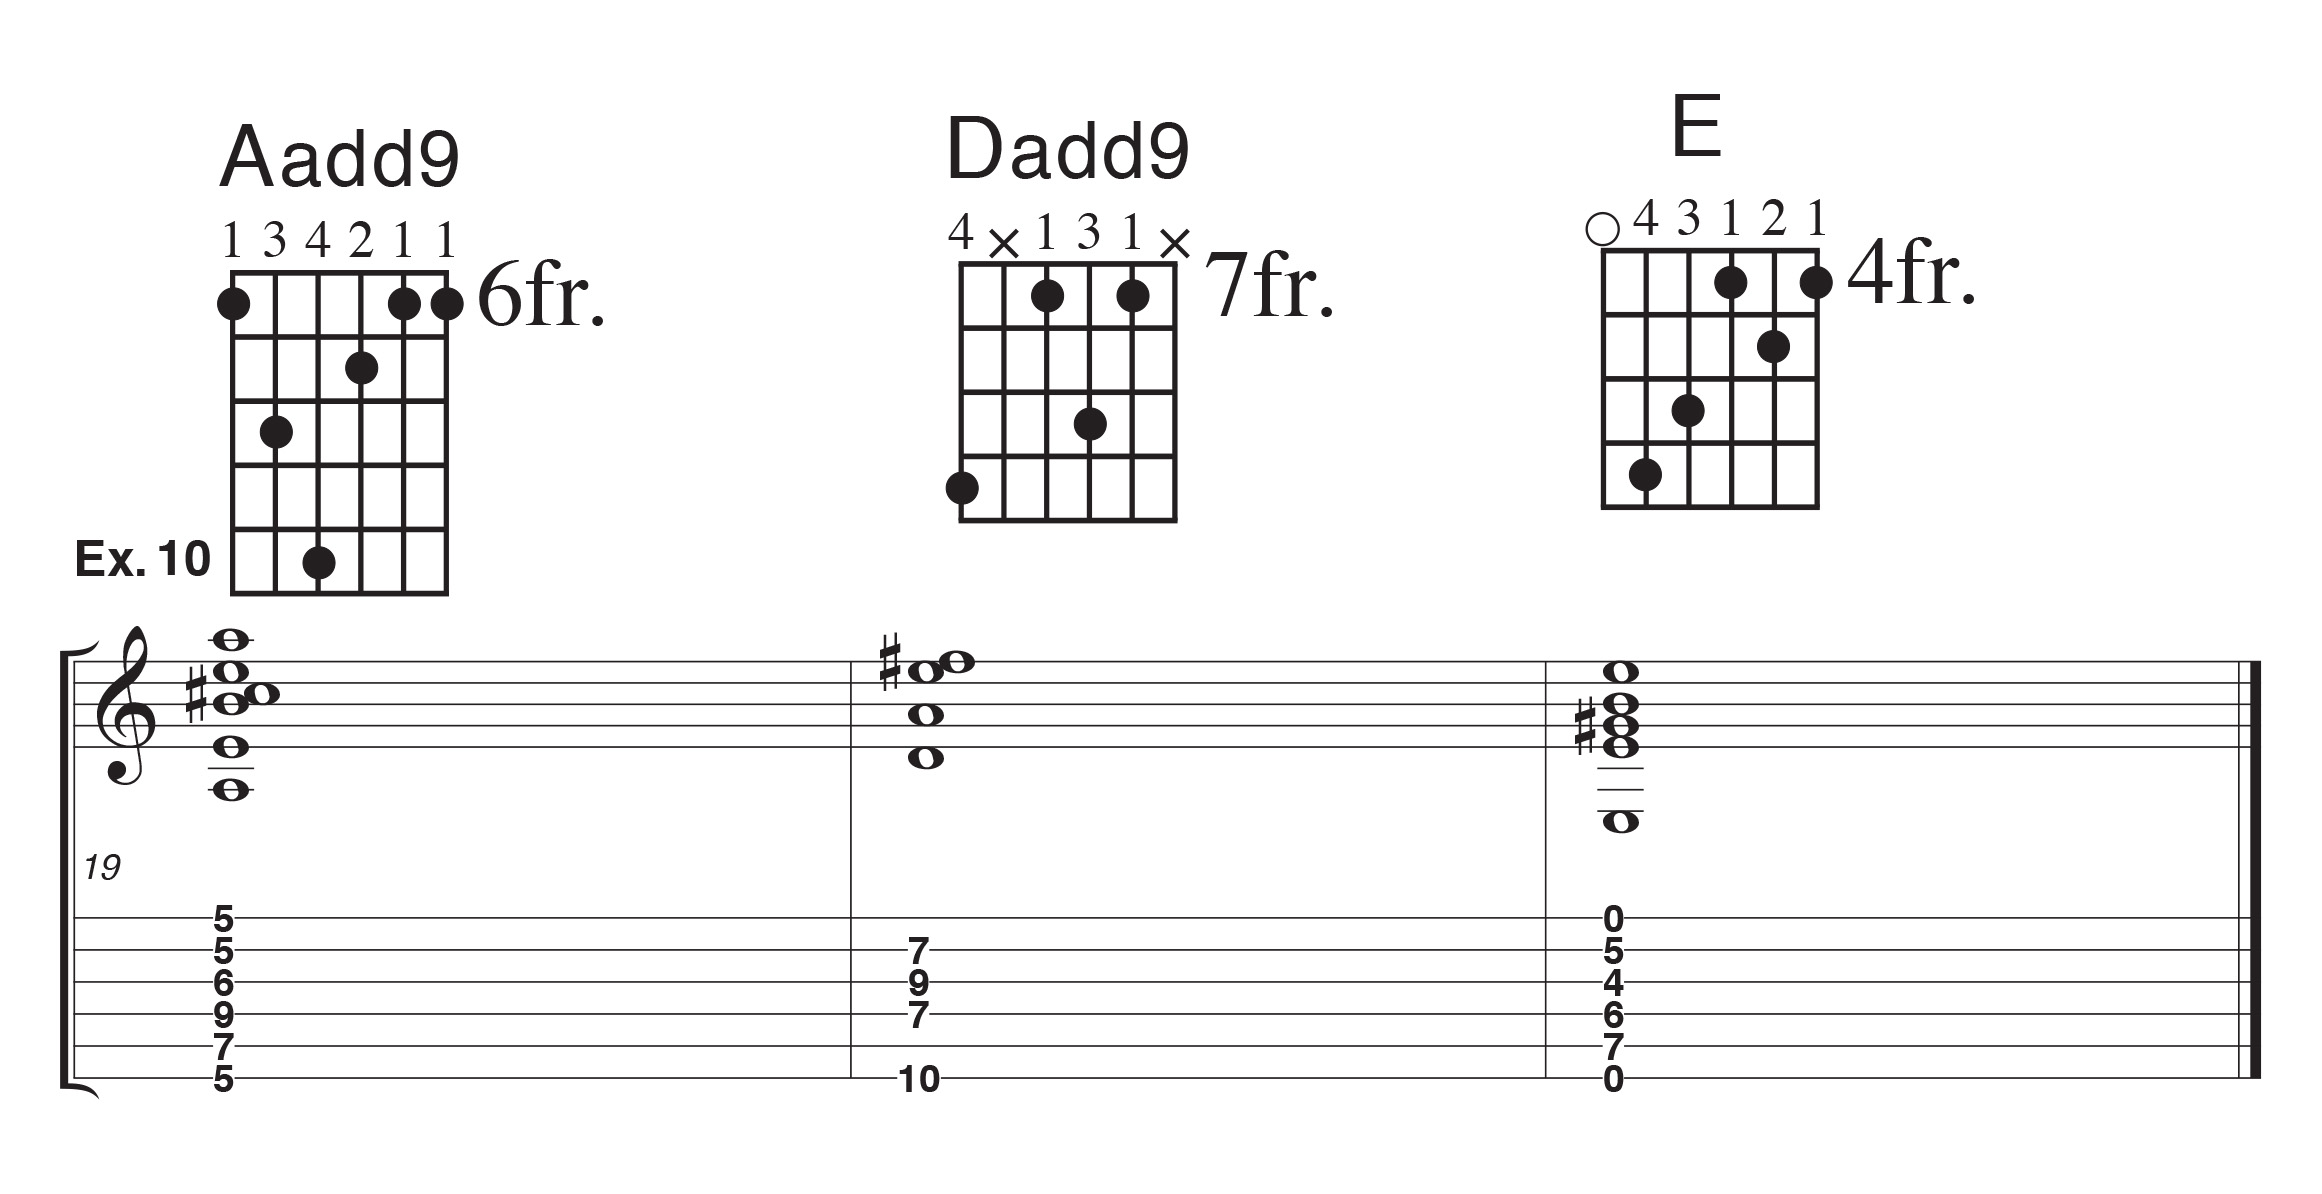
Now that you can play one chord perfectly, it’s time to work on our ch-ch-changes. Think about all that happens when we play a chord progression. Sometimes one finger plays the same note in all the chords of a progression, but most of the time each finger plays a different note in each chord. Each string needs a different amount of pressure, each chord requires a different placement in each fret. Breaking these movements down to the smallest possible increment makes a huge difference and if you can master changing from A to D to E, going from Aadd9 on the 5th fret to D2 to E will become a breeze.
Illustrations:
Try these examples. For each chord, take time to place each finger in the “sweet spot” of the fret, play the chord and check in with all the strings. Think about the next chord. Before even moving one finger, check out which fingers are moving and which ones are staying put. Which finger needs to move the farthest? How many have to cross the strings? As you’re holding the first chord, before playing anything with your right hand, move one of your fingers to the next chord, move it back. Then move two fingers, move them back, then move all the fingers, move them back. Once you’ve memorized the chord progressions and they sound great as a whole note, you can apply new rhythms and strum patterns.
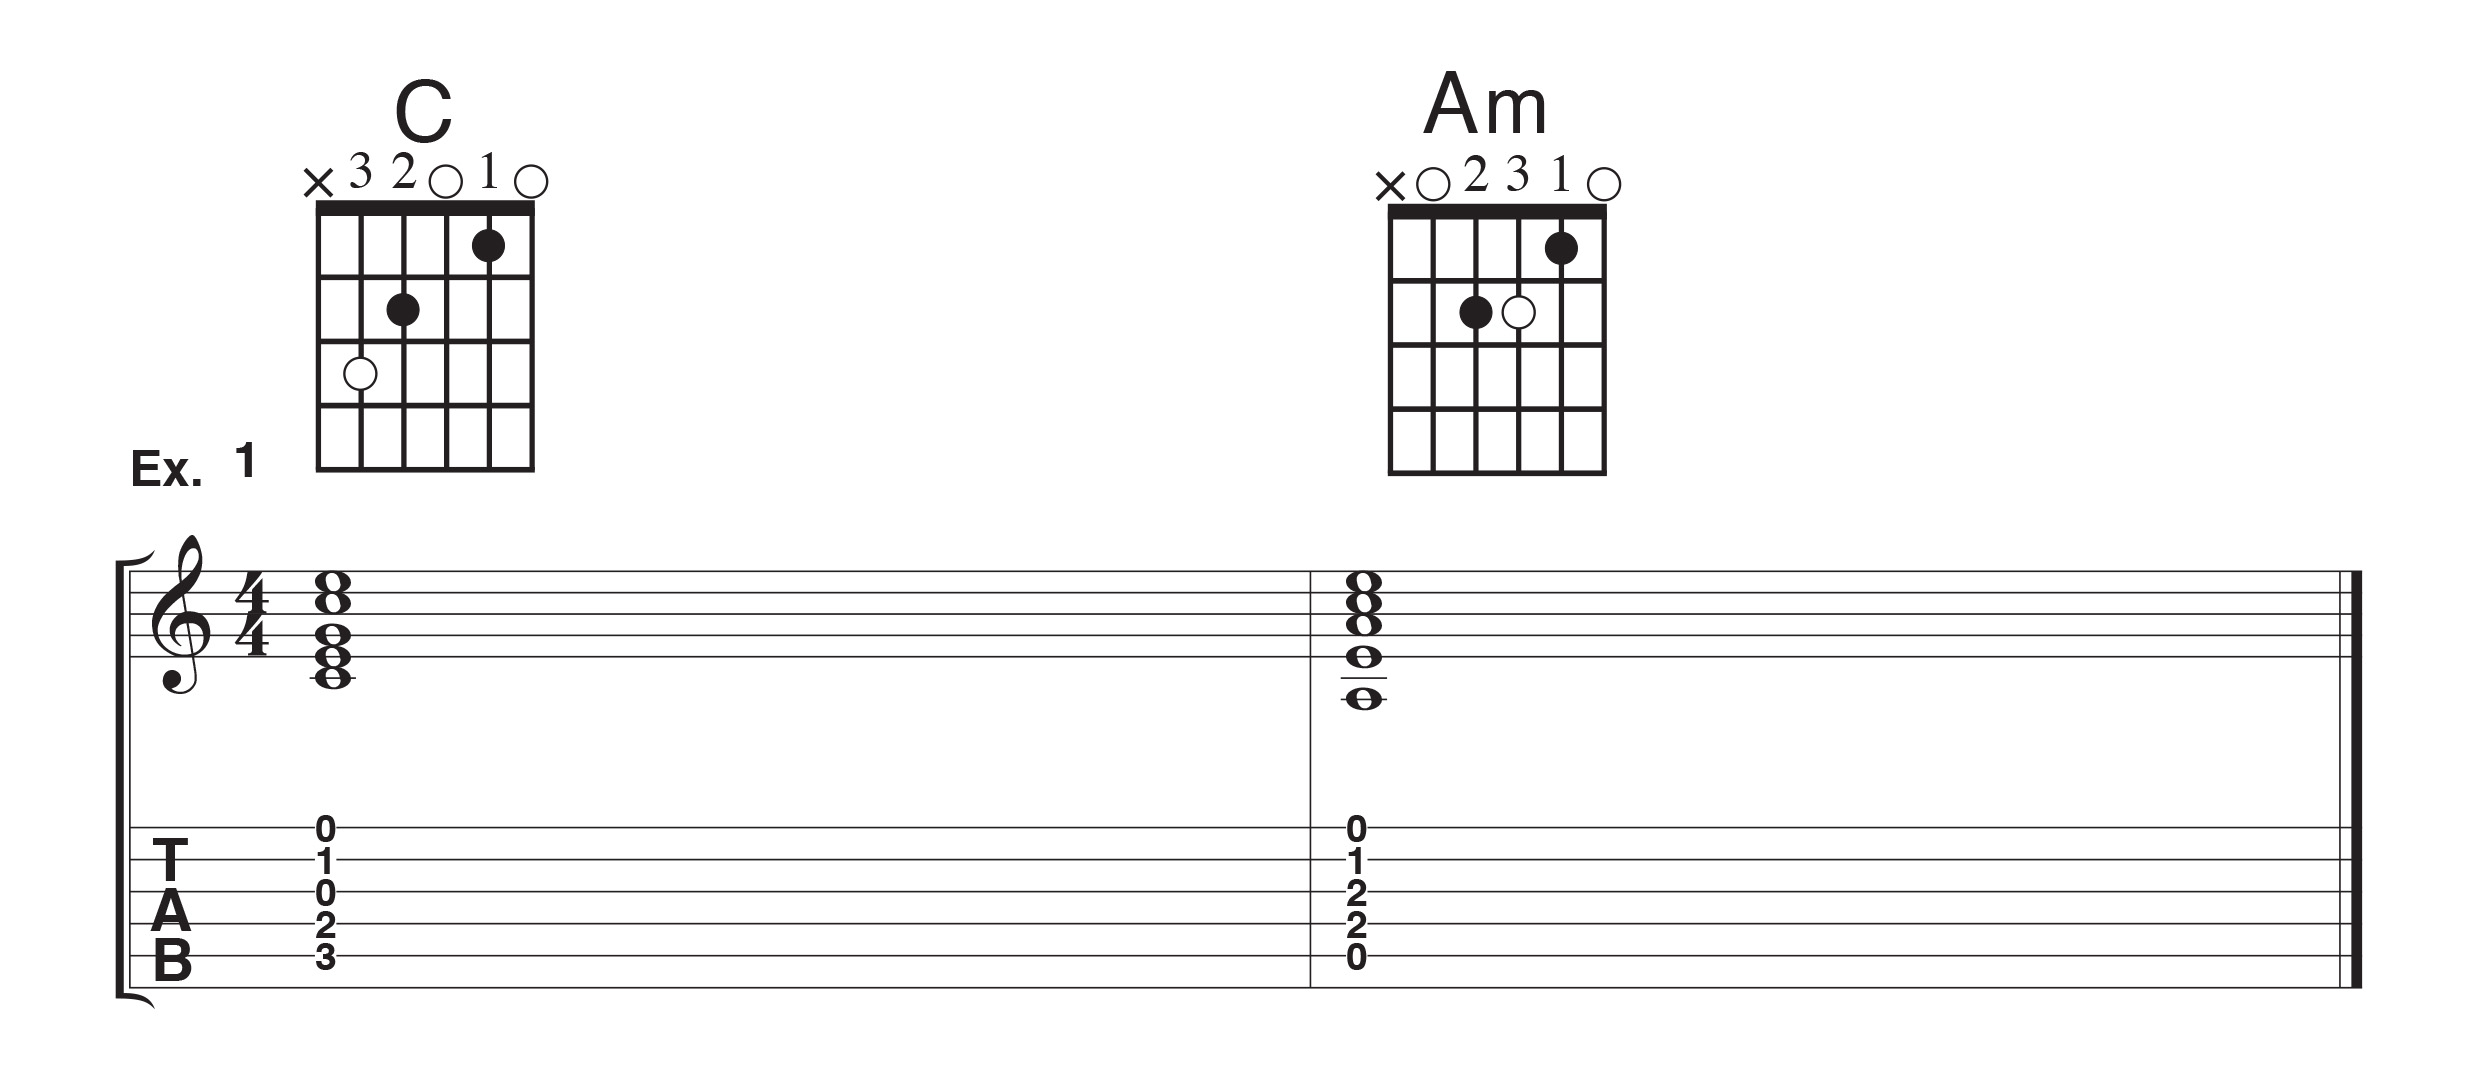
In example 1, notice how I’ve indicated with a white circle the only note that changes between the two chords.
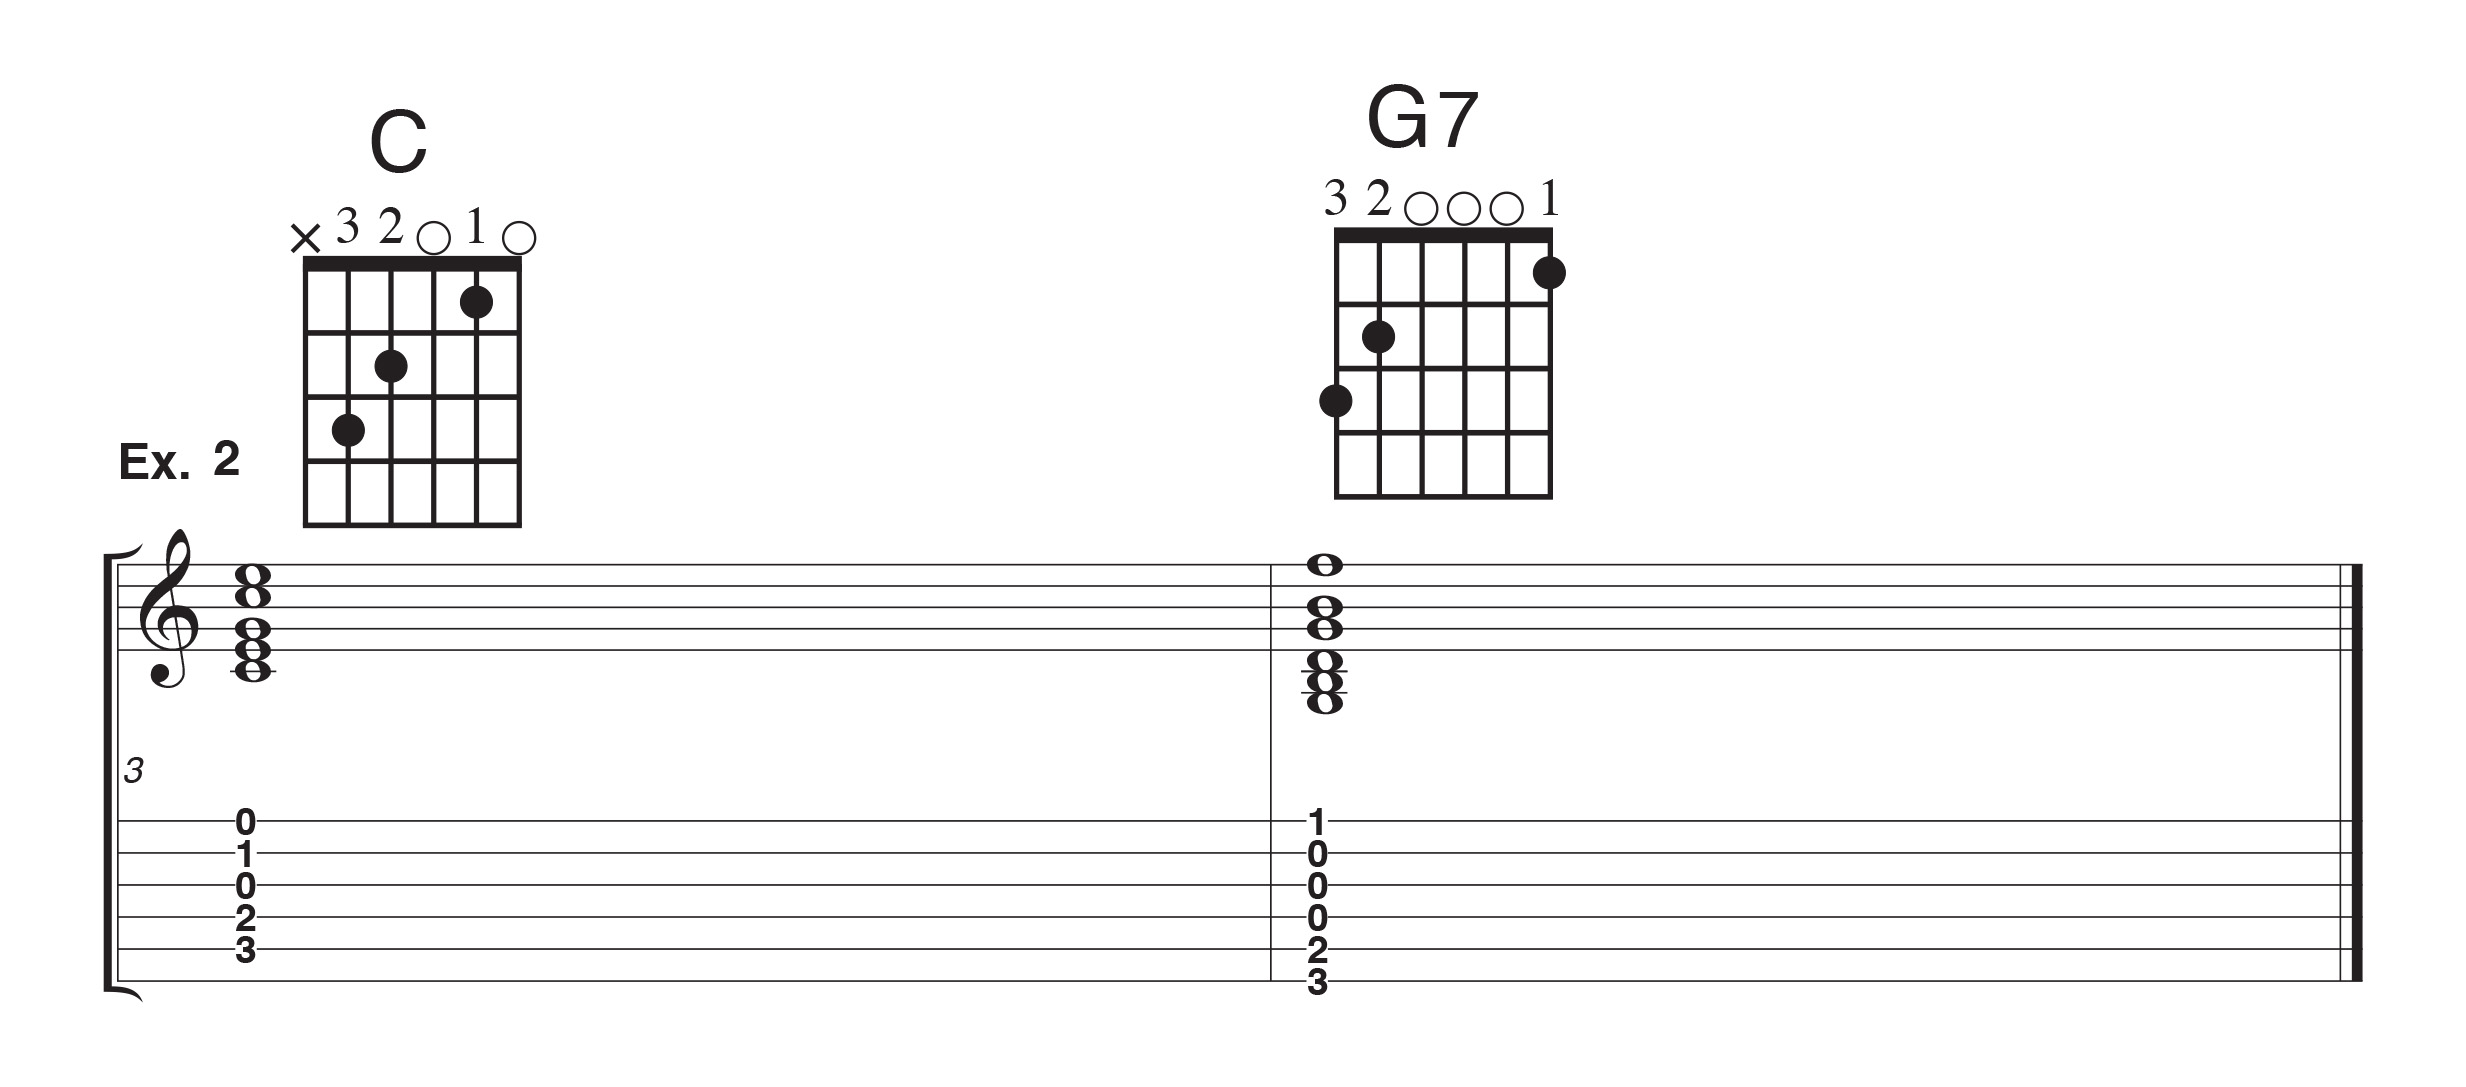
In example 2, you will need to move all the fingers to get from C to G7. But you won’t have to change
frets, just strings.
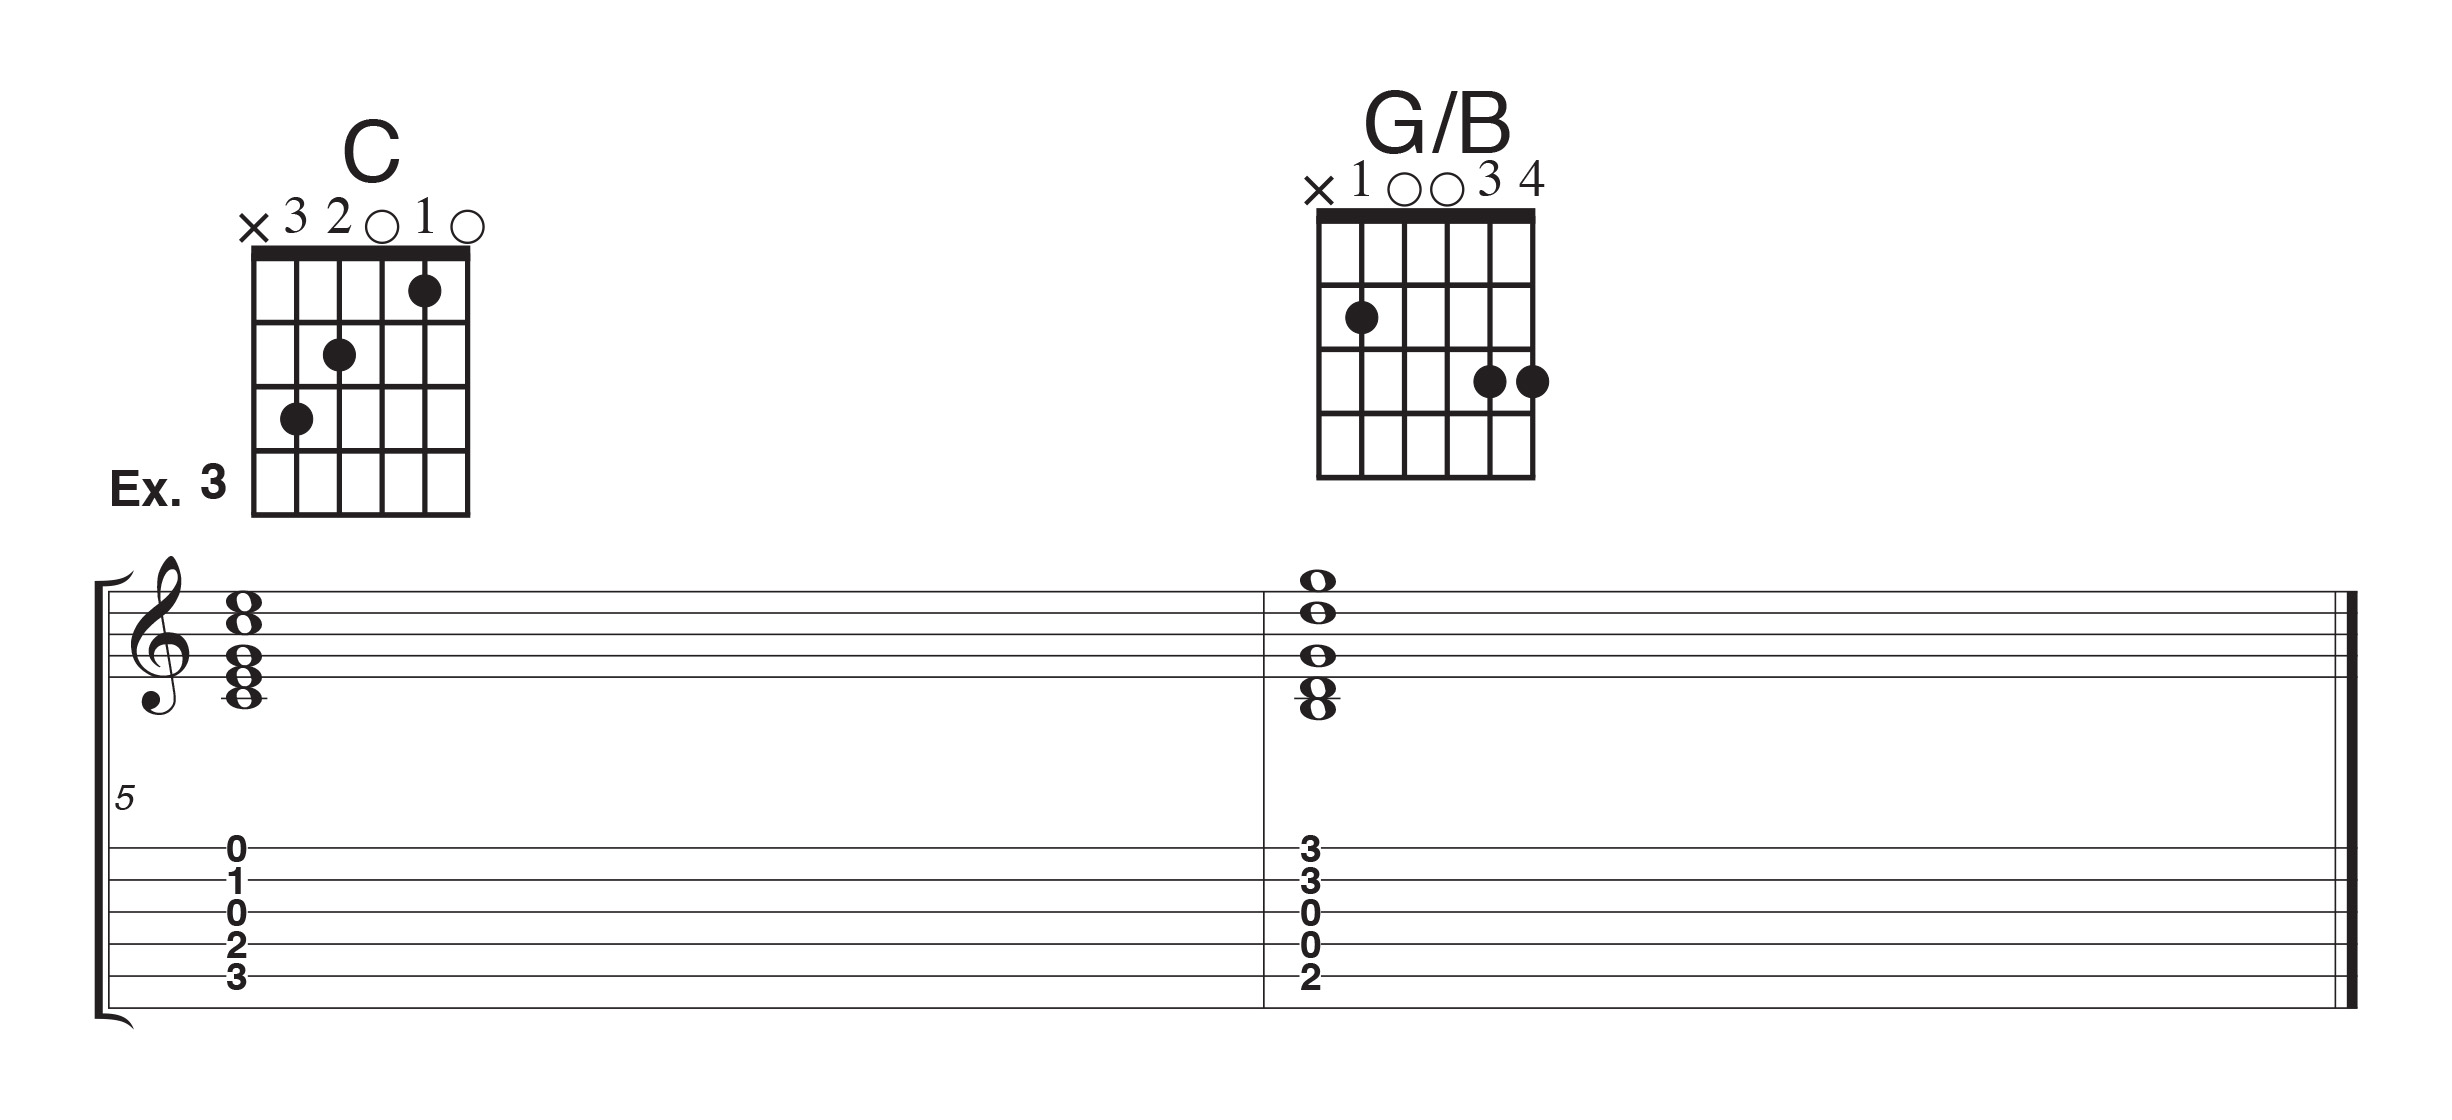
In example three, the third finger must cross two strings. Practice just moving that one finger, while holding the C Chord, from third fret, 5th string, to third fret, 2nd string.
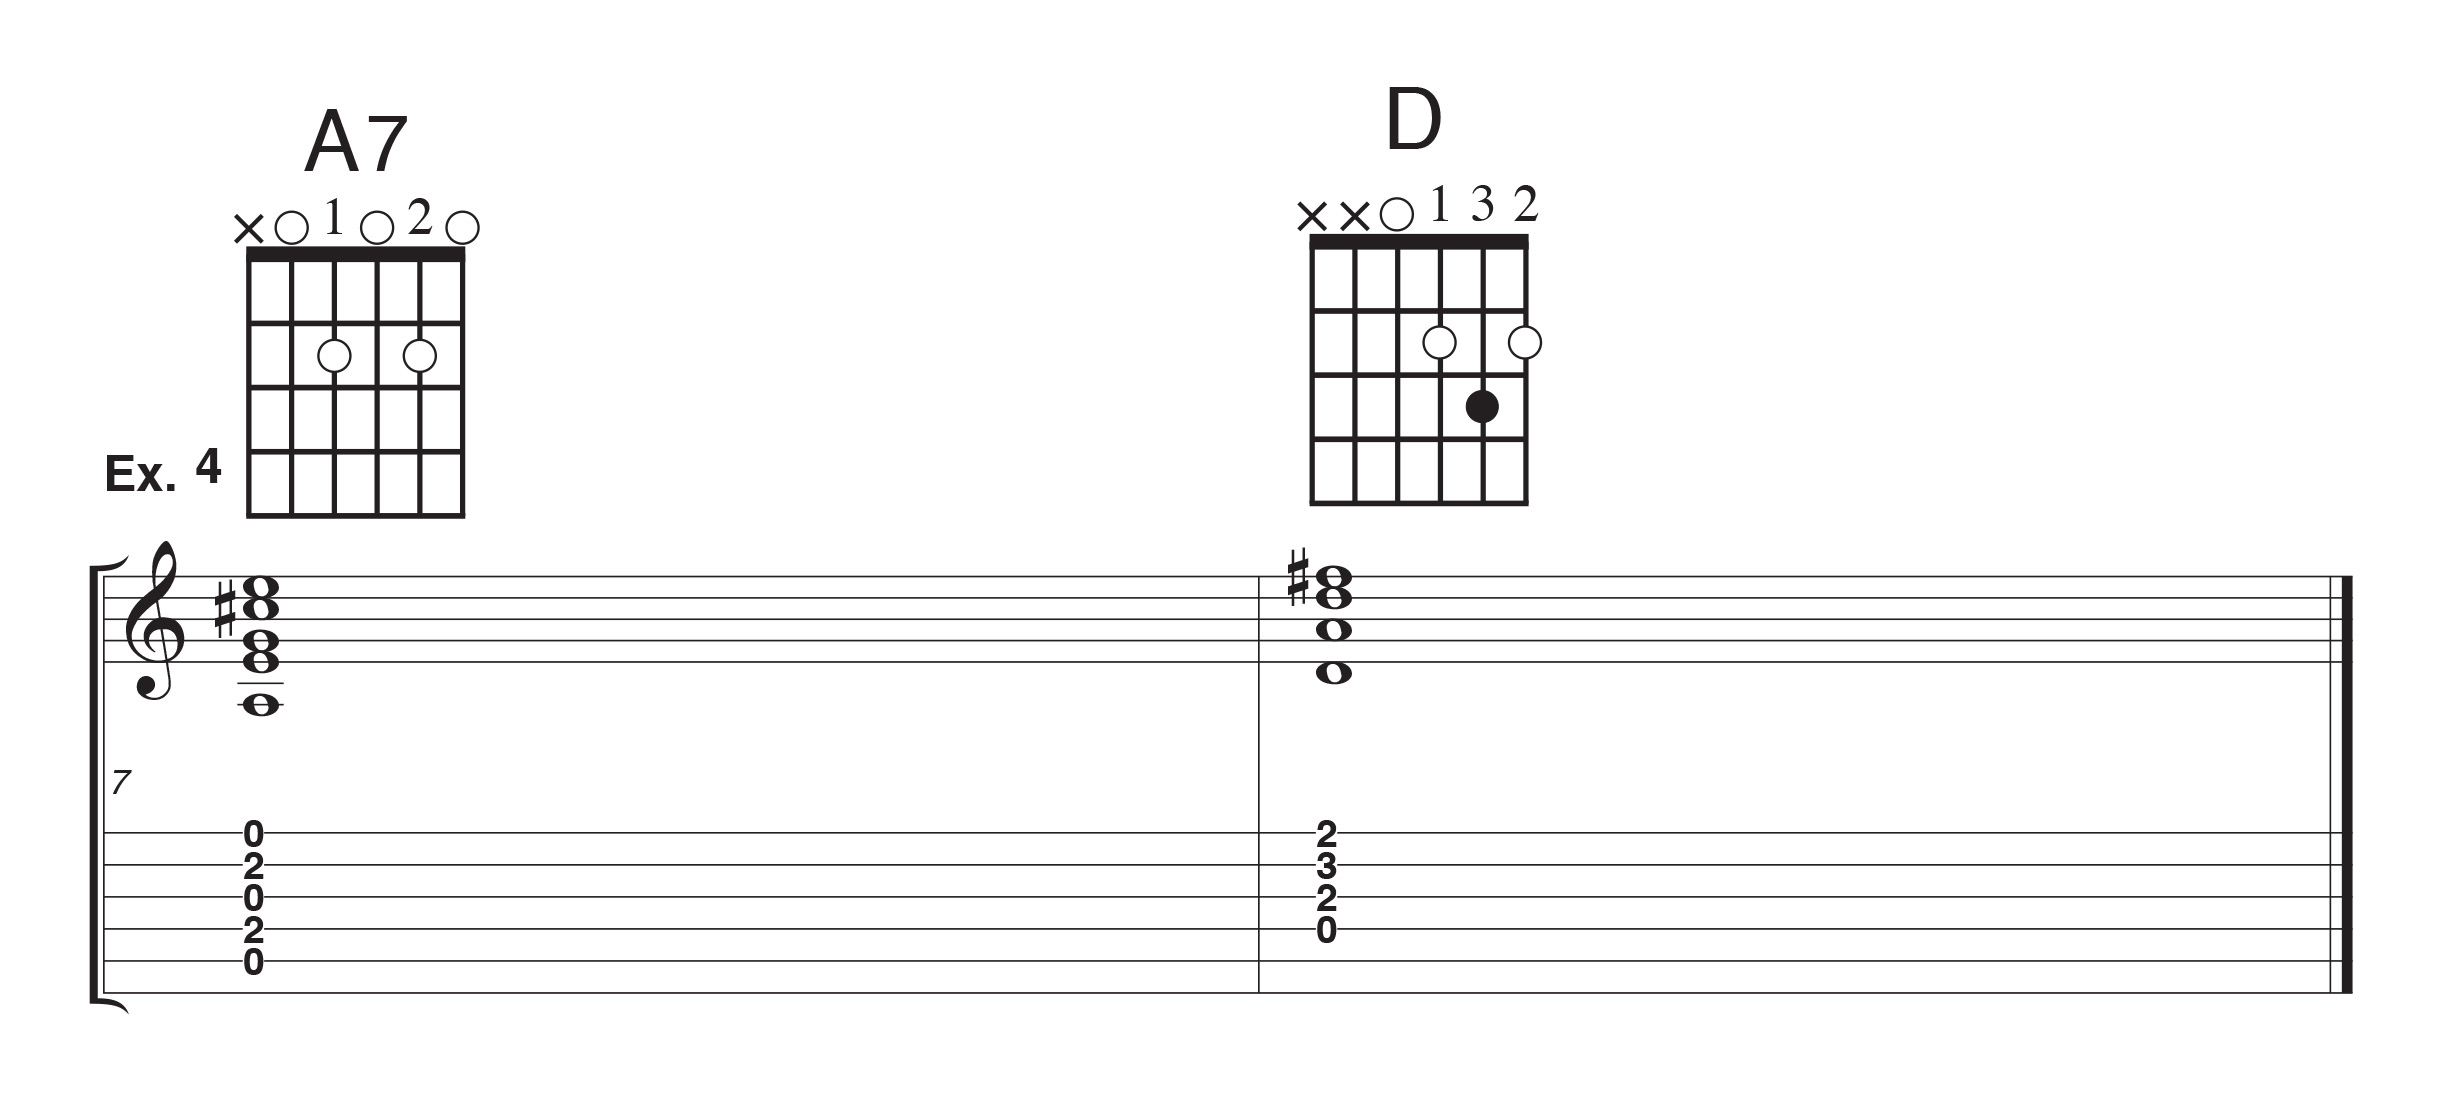
Notice the white dots in example 4. The 1st and 2nd fingers move down one set of strings. Be careful to check in with the chords. Play each string individually to ensure none of the strings are
muted by your fingers.
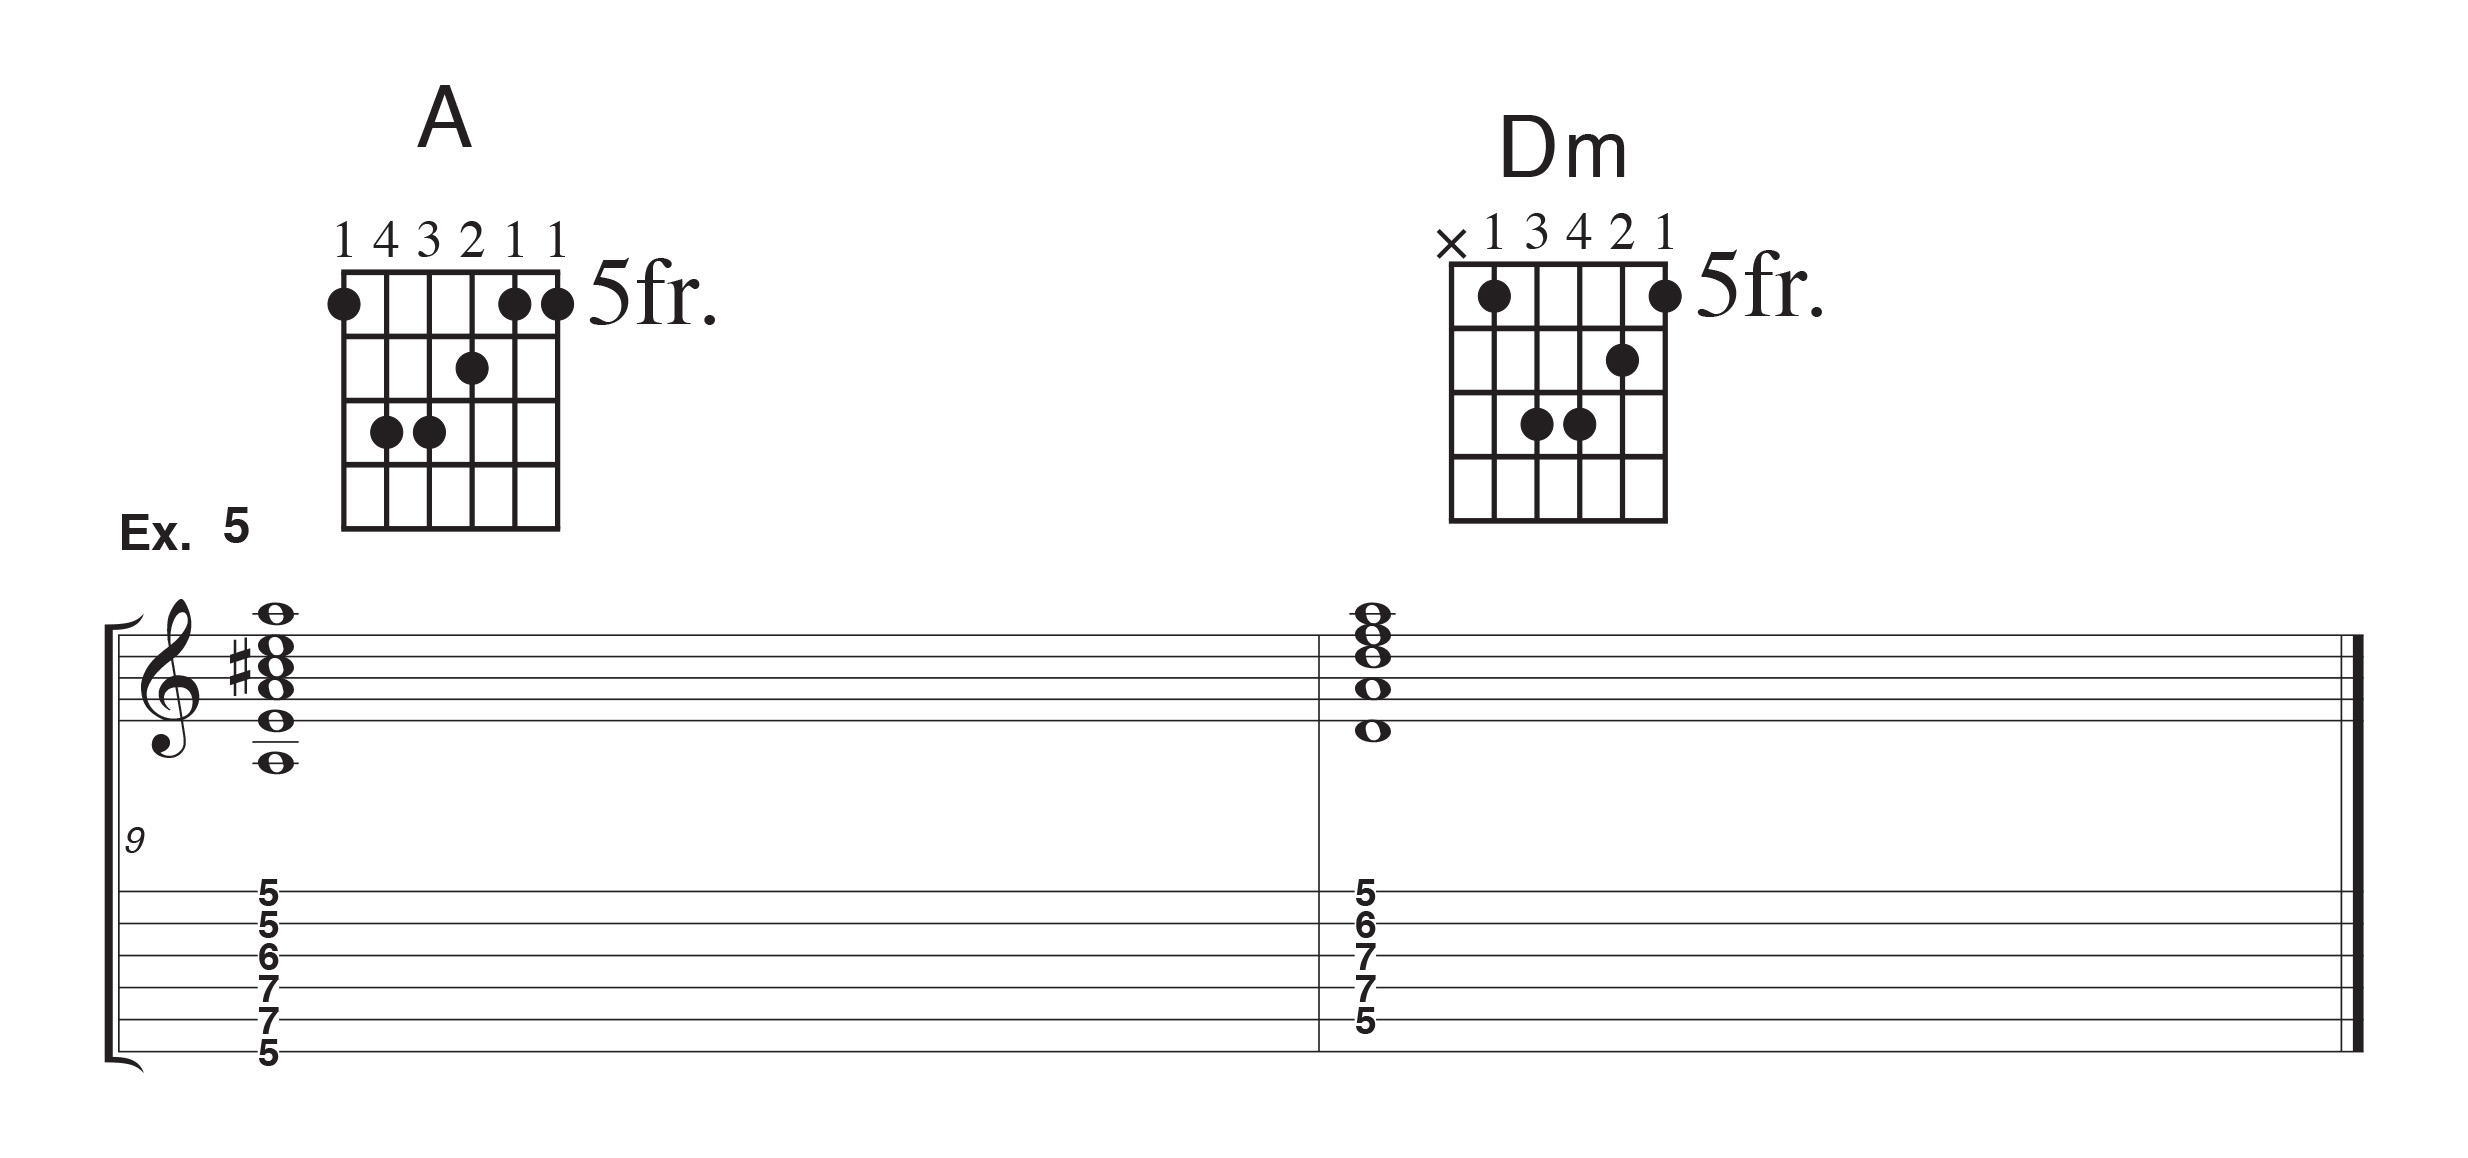
Example 5 is going to take more strength than playing open chords. Don’t forget to leave off the low E string when playing the Dm.
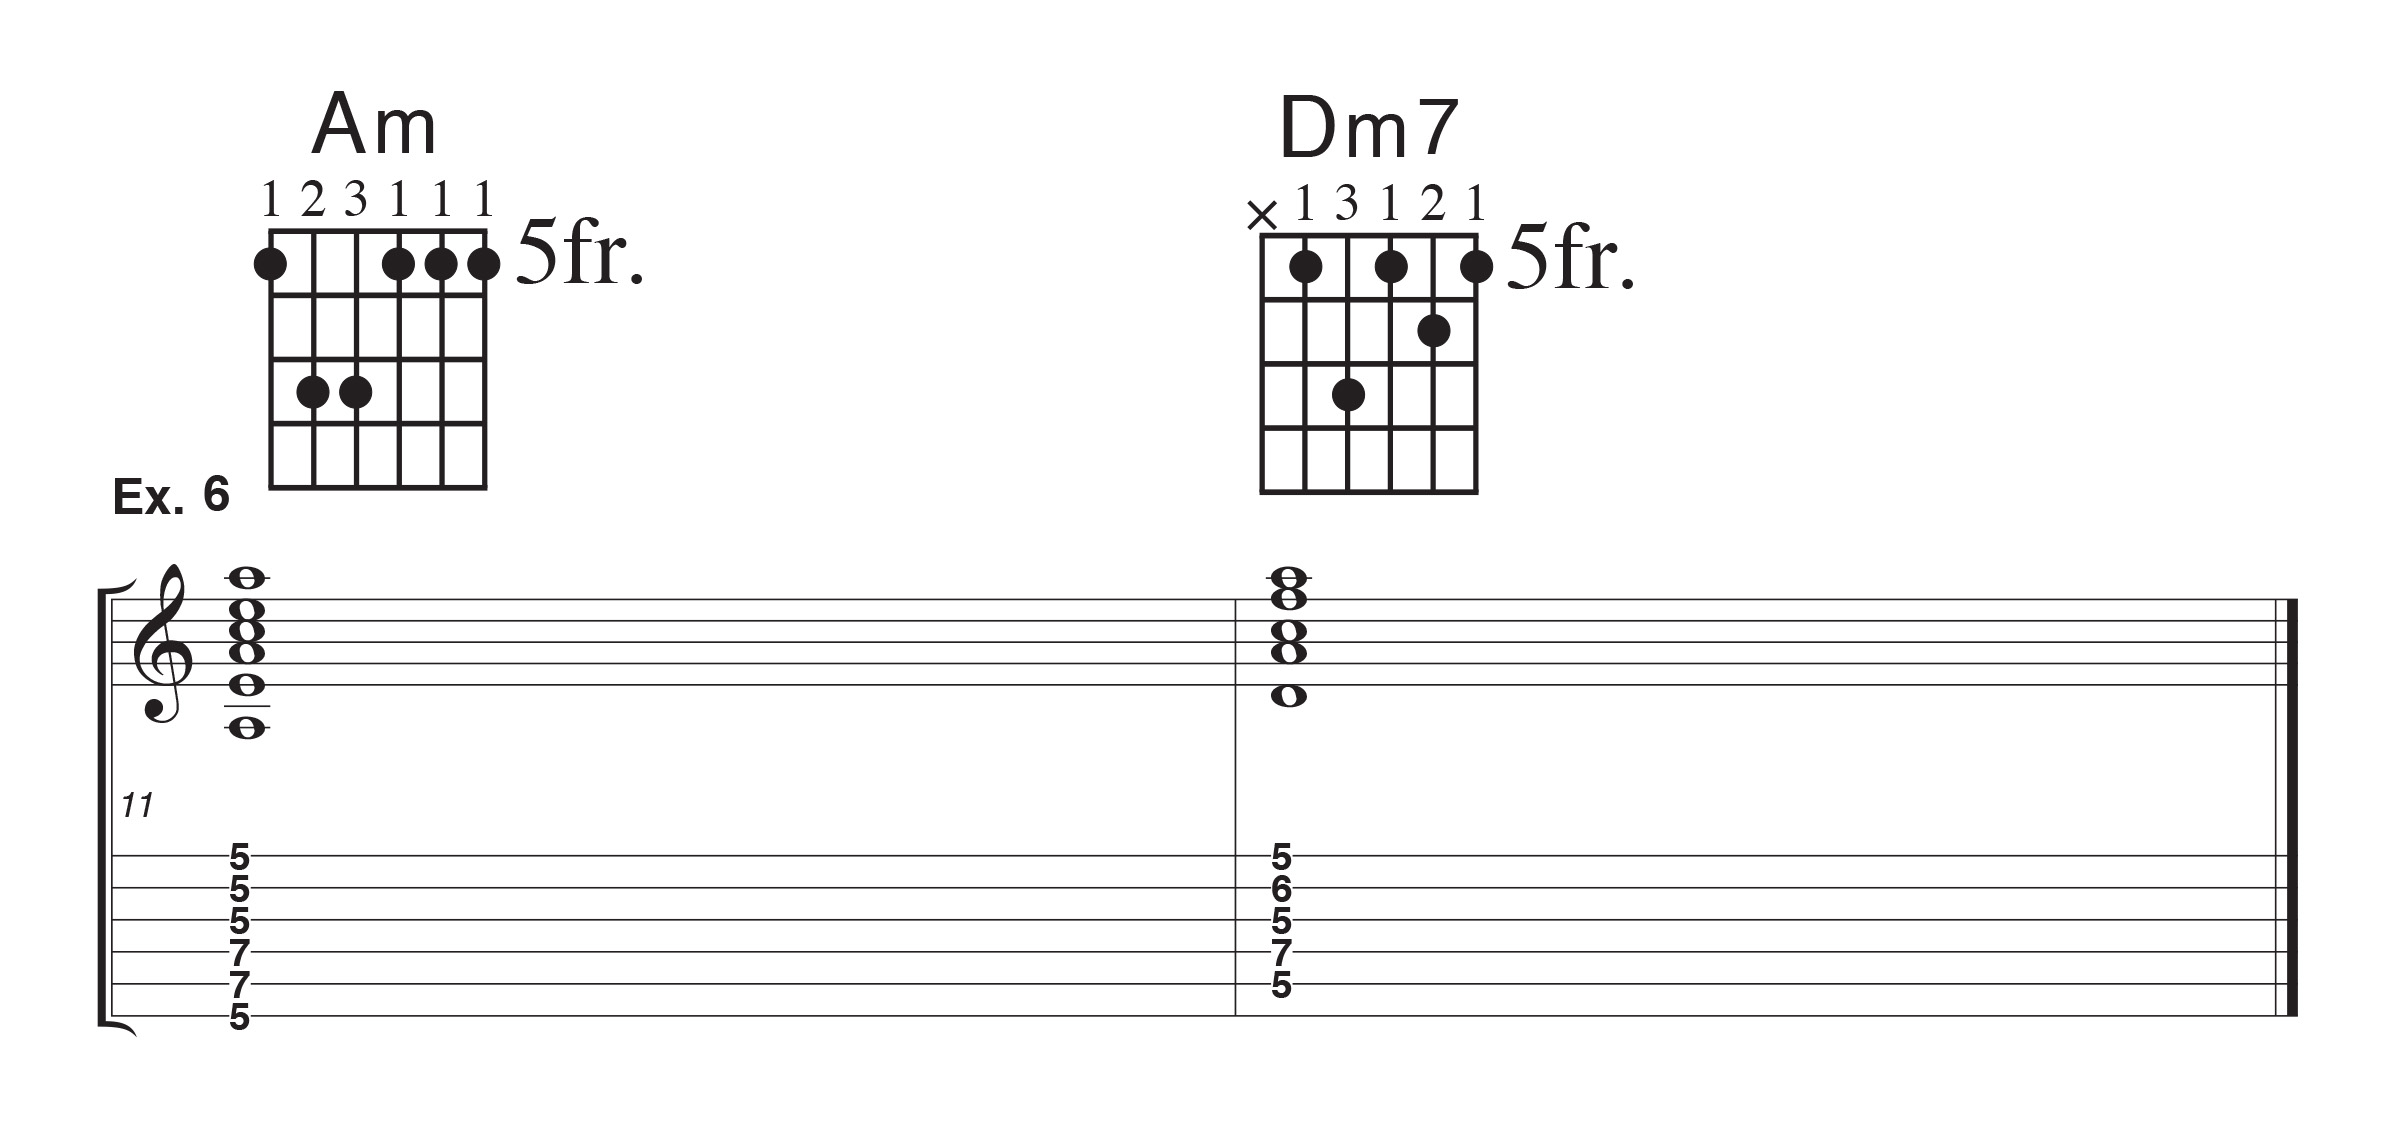
Make sure to check in with the 3rd string on example 6. That one tends to get muted, especially on the Dm7.
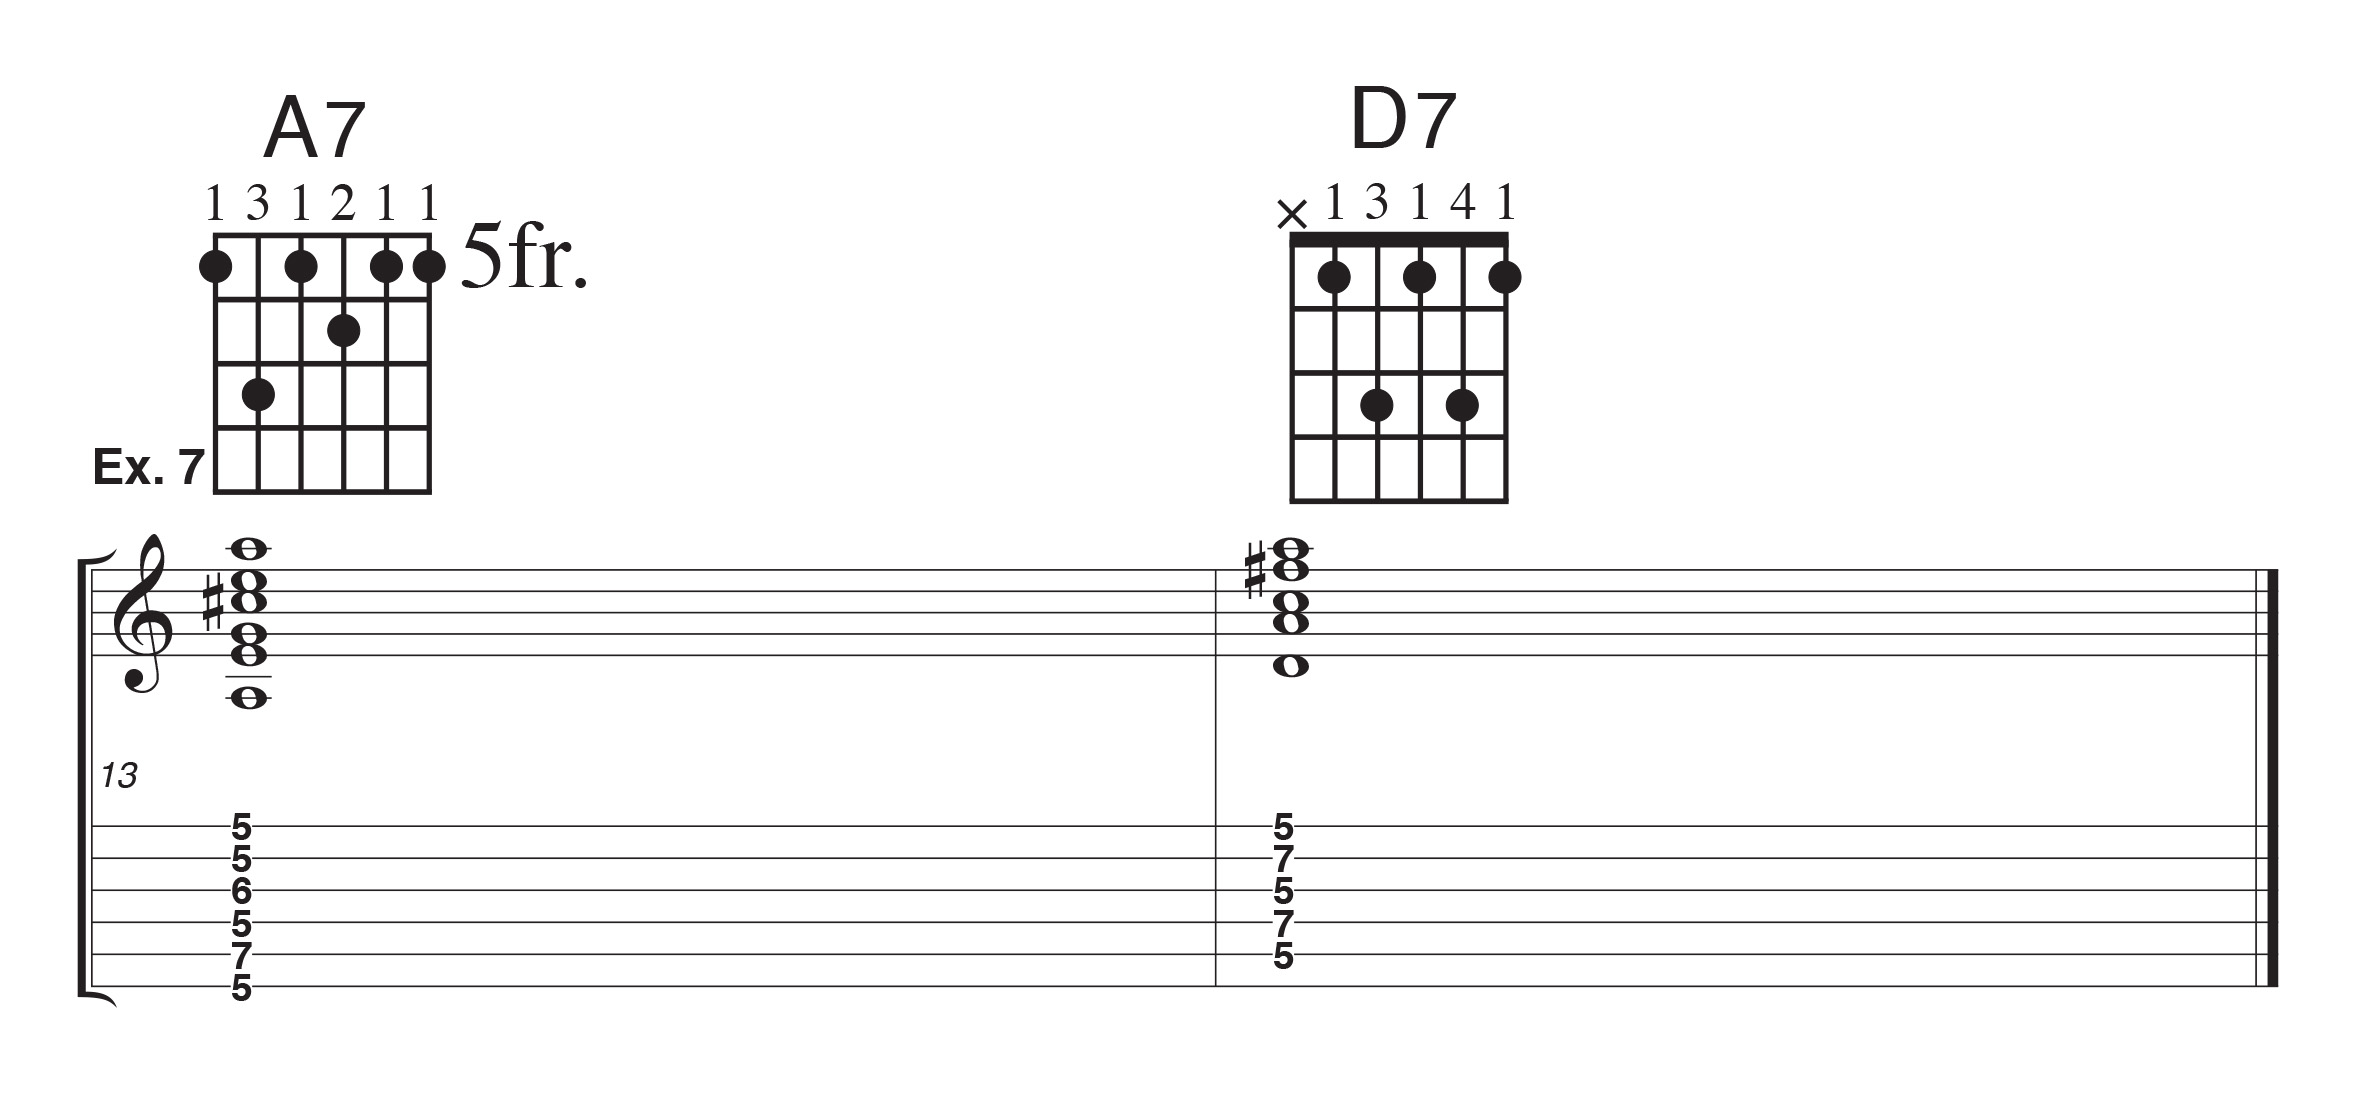
More Barre chords. For example 7, check in on the 4th string for A7 and the 3rd string for D7.
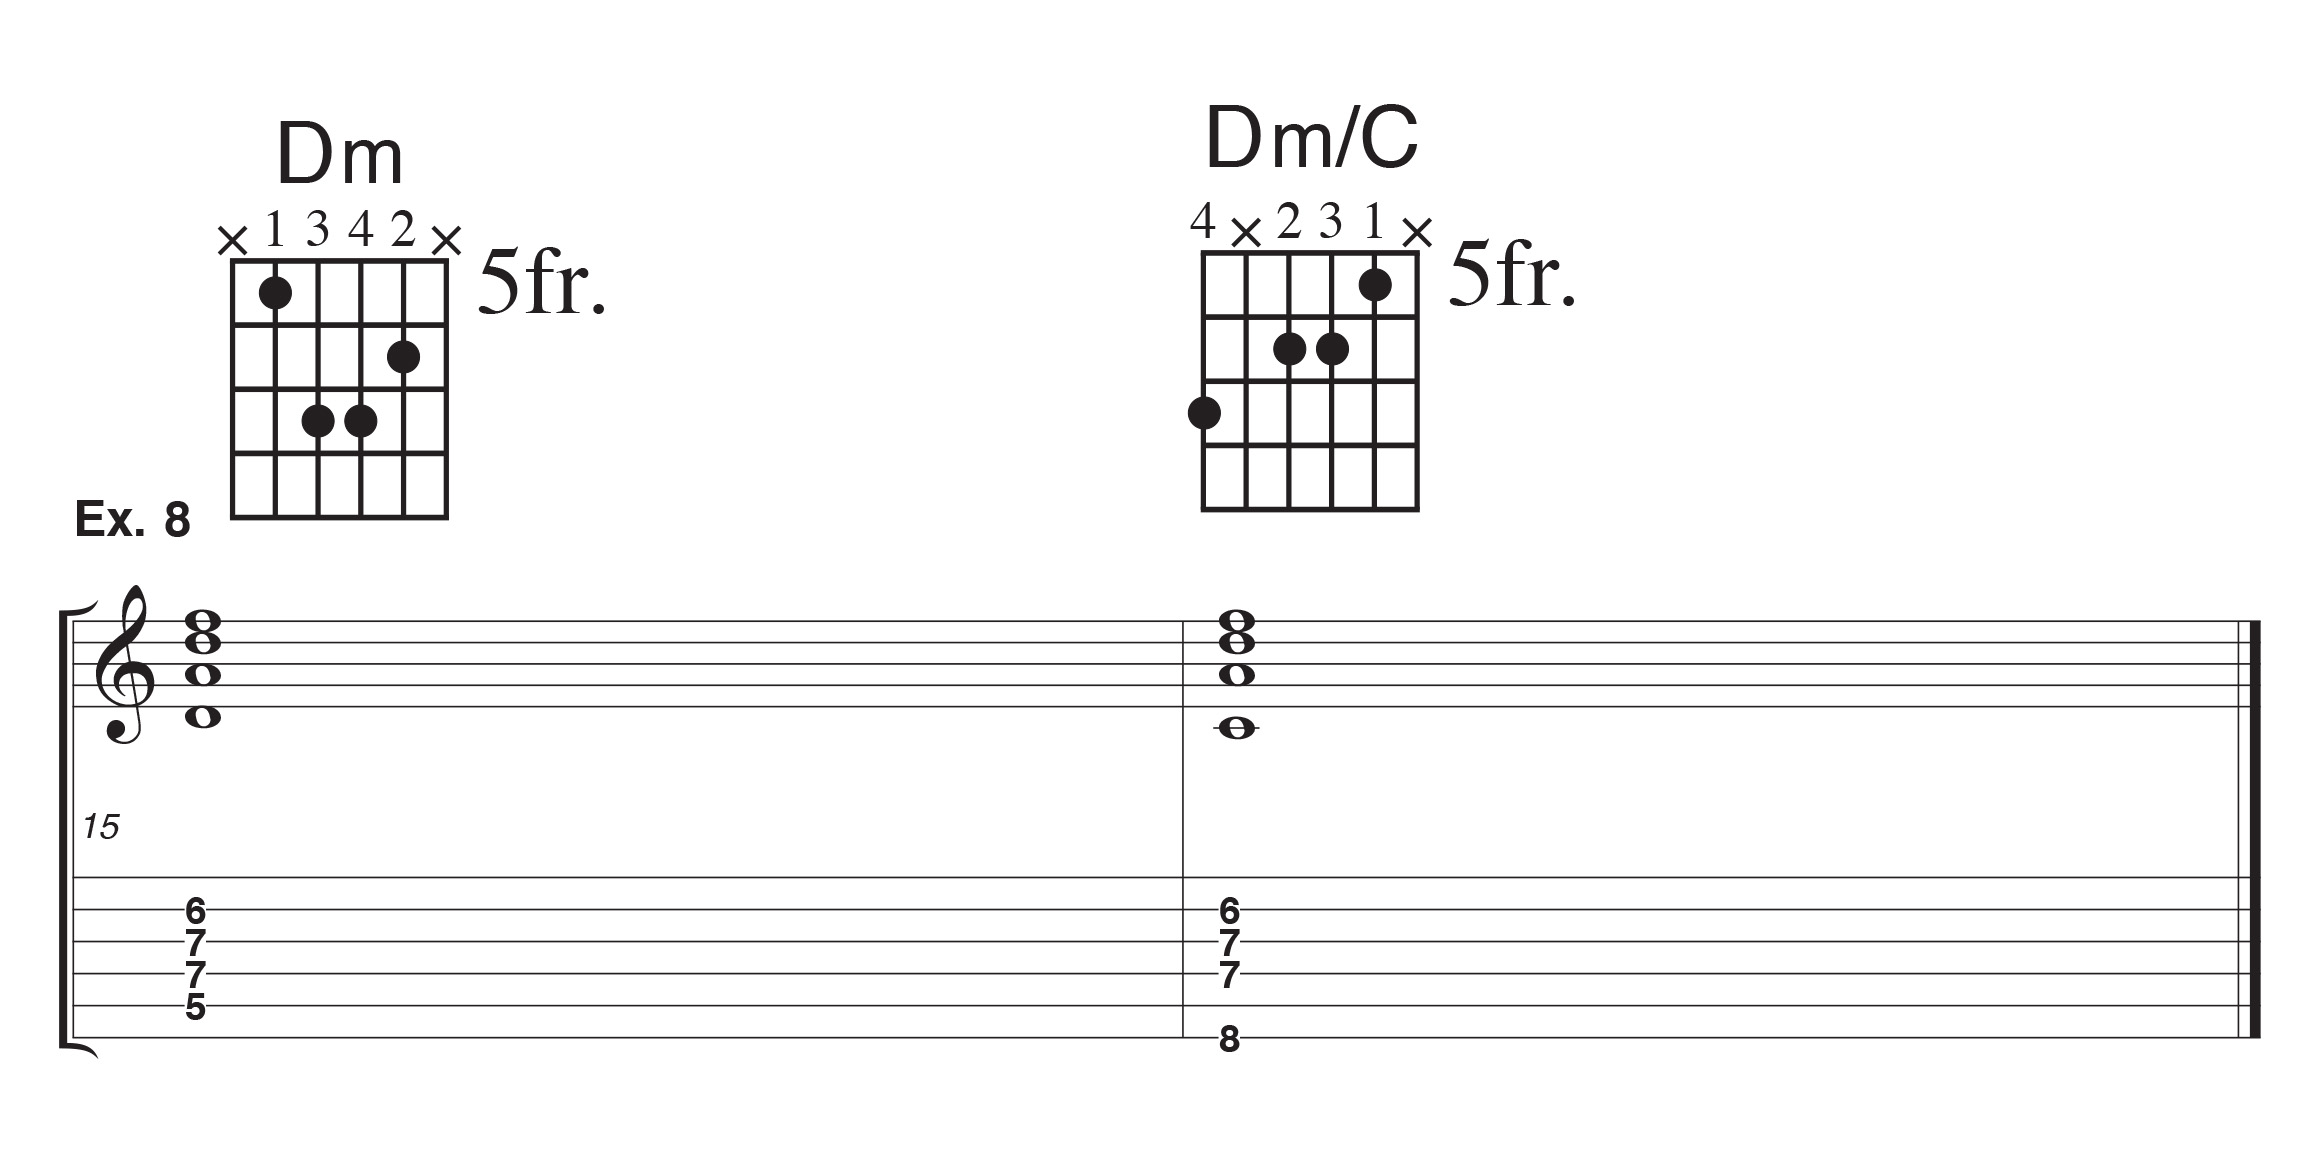
Example 8 is a little tricky, but a great sound with the descending bass note. Take your time to feel the correct placement of the fingers in the frets and watch out for those “X”s!
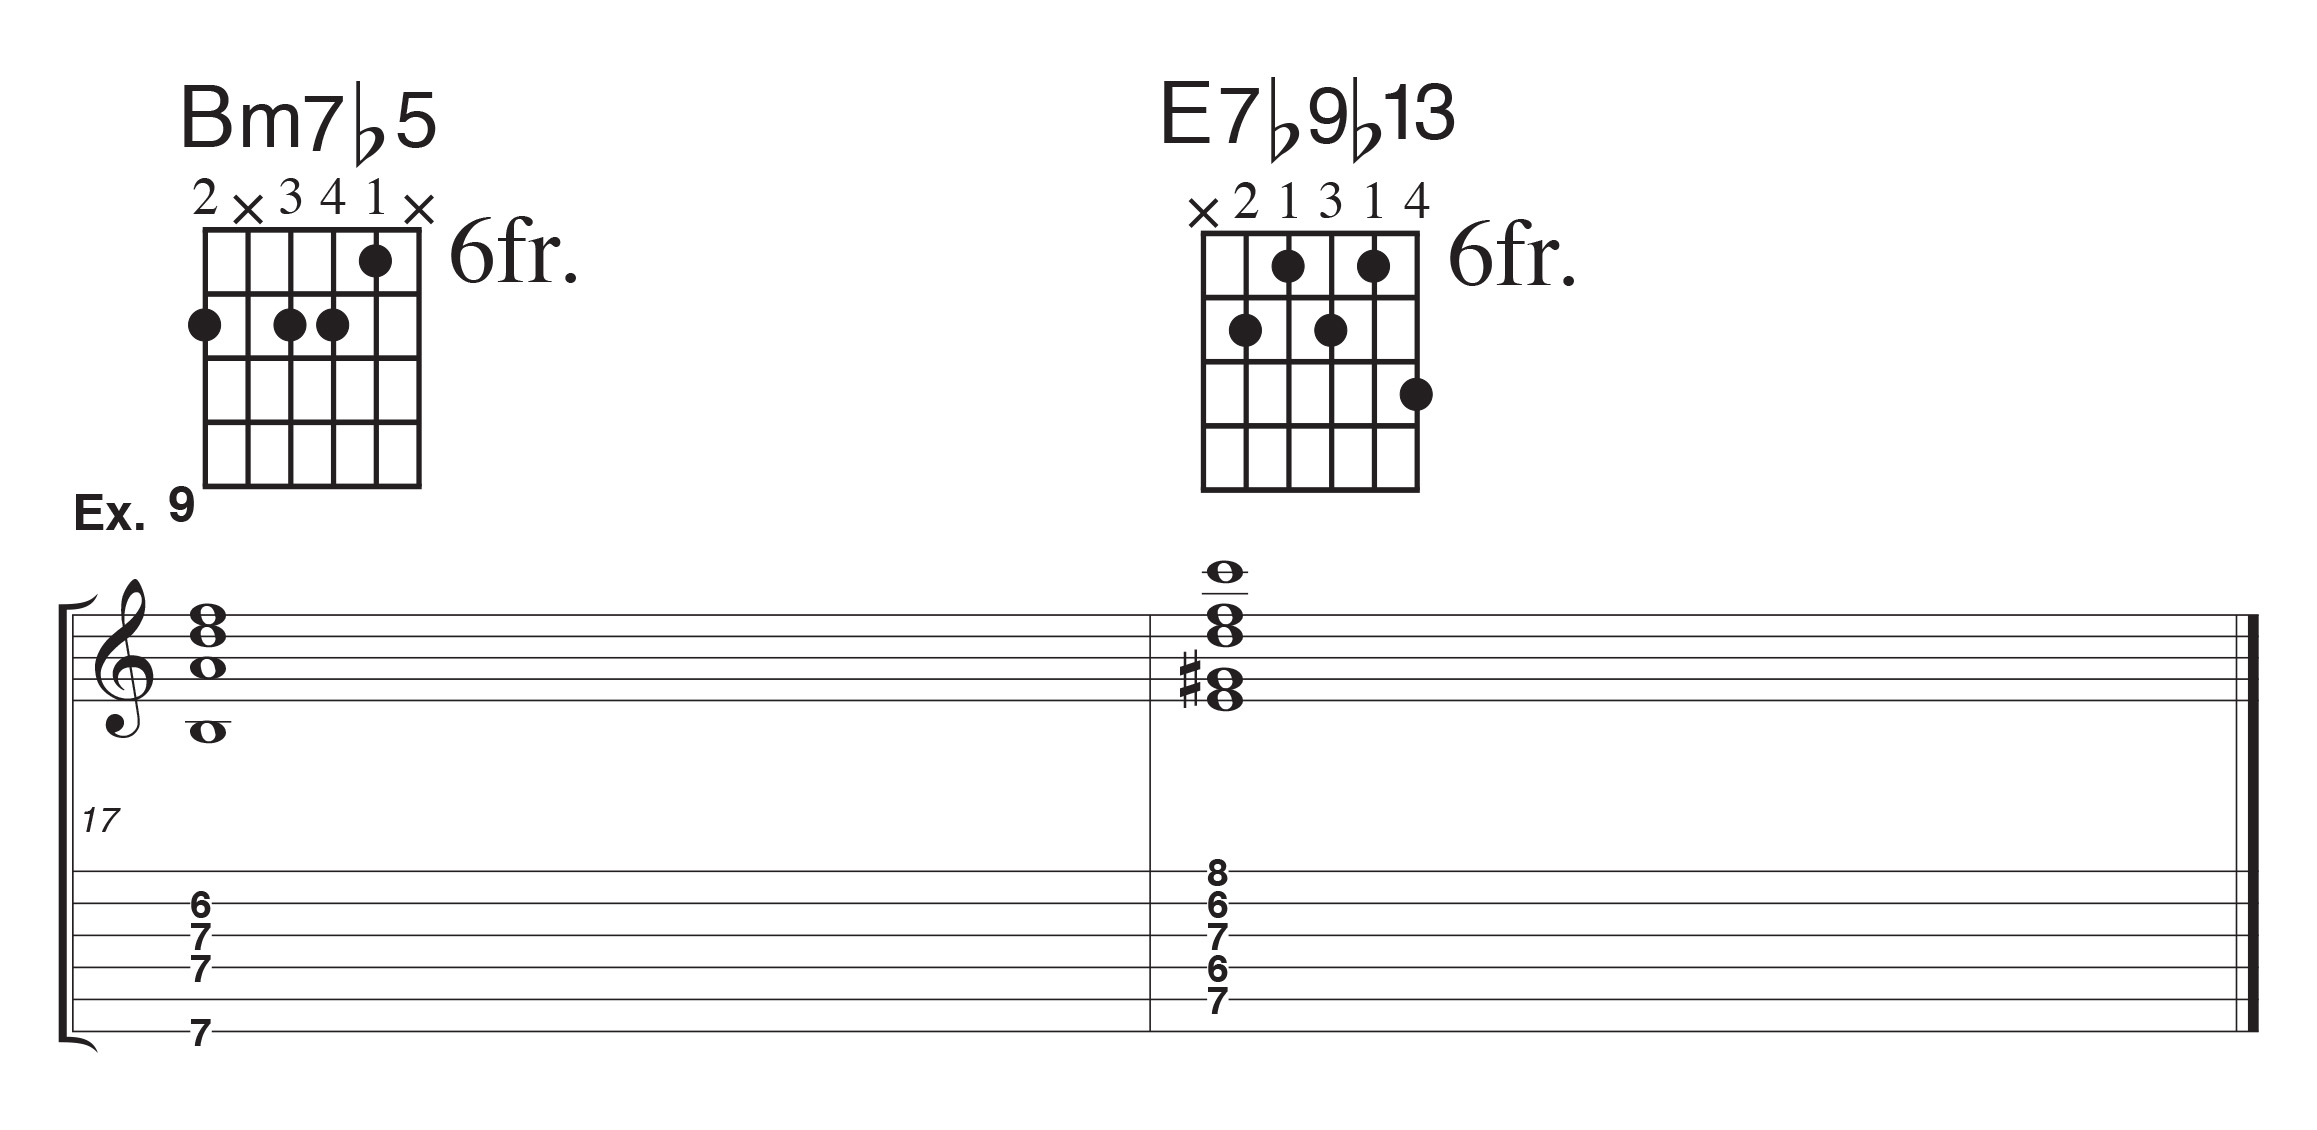
These are some great chords! Example 9 might challenge you with your tuning. E7b9b13 requires a barre with the first finger. Don’t press too hard on the b7 or the b13, or you’ll pull the
notes sharp.
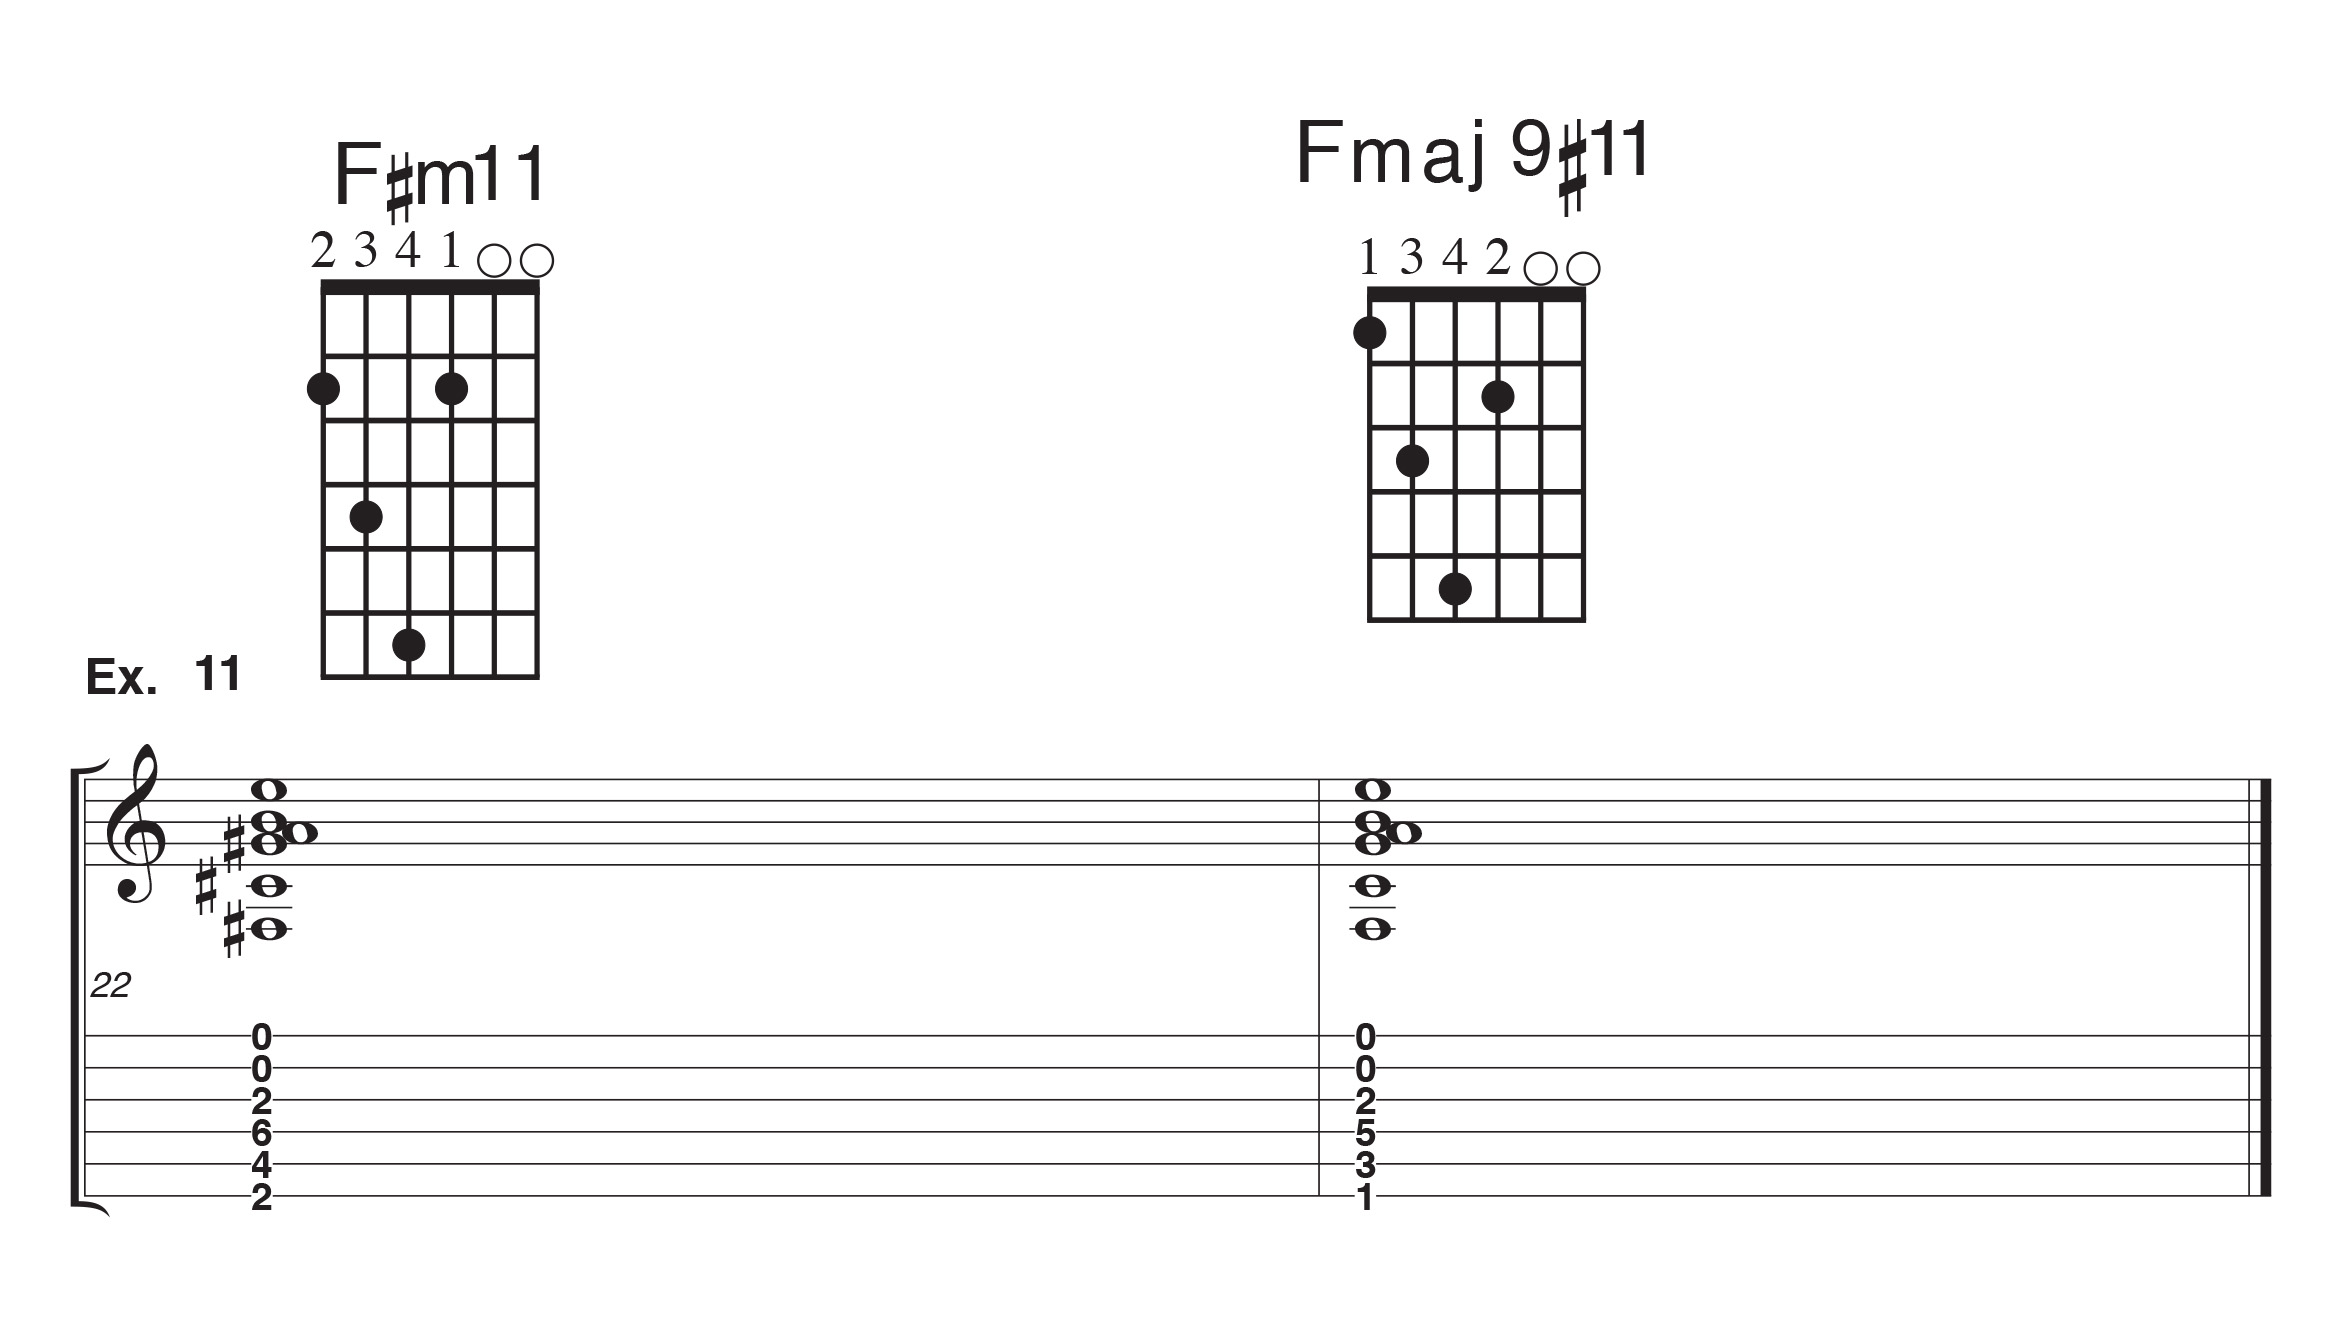
Are you ready for a challenge? Try example 10. Beautiful voicings with lots of stretching!
Don’t hurt yourself playing example 11! Consult your physician before trying this at home. Let me know how it goes. Juli Morgan and TrueFire are not responsible for any injuries incurred
while attempting to play these chords. Side effects may include headache, nausea, blindness, and confusion. Stop playing immediately if you feel short of breath.